Managing Apps
Adding an App
To add a new App to the console click the primary action button while viewing a client.
Fill in the name of the App, and optionally, add a brief description or upload an icon. Click "Save".

You will now be redirected to the dashboard for that app.
Editing an App
From the Client dashboard, use the context action on the App card you wish to edit, select "Edit"
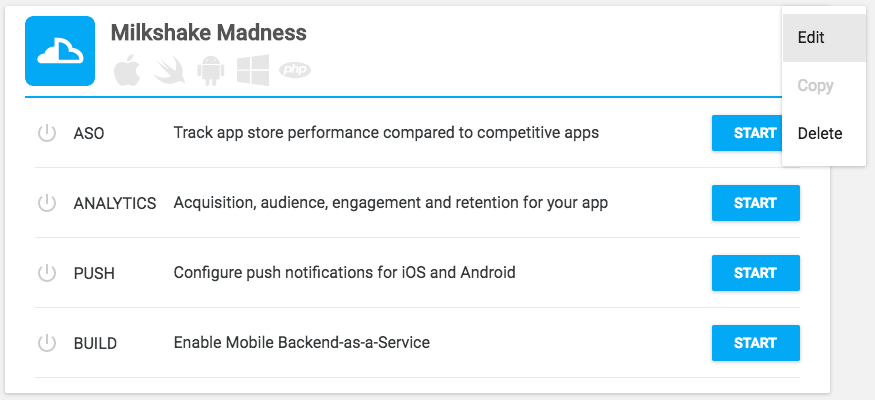
Make any edits you wish, then click "Save" to return to the Client dashboard.
Deleting an App
To delete an App, from the Client dashboard use the context action on the App card you wish to delete, select "Delete"
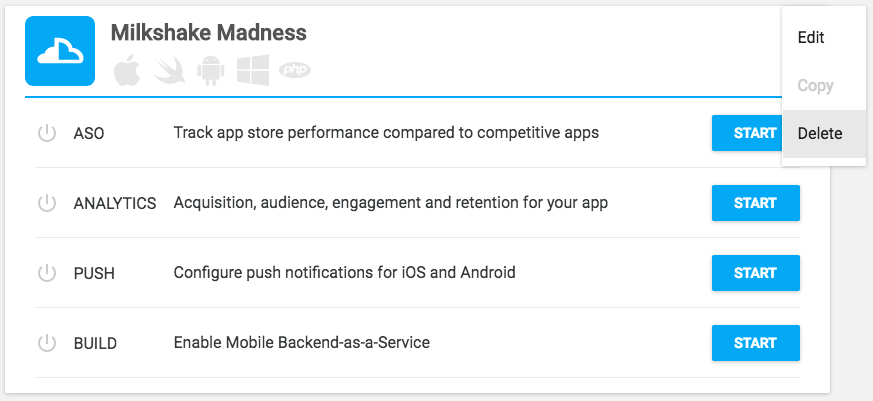
You will be prompted to confirm the deletion.

After deletion the App will be removed from the console.
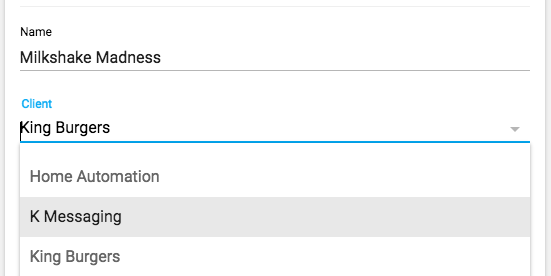
Moving an App to another Client
To move an App to another Client, simply edit the App and select a new Client from the dropdown, click "Save" to confirm.
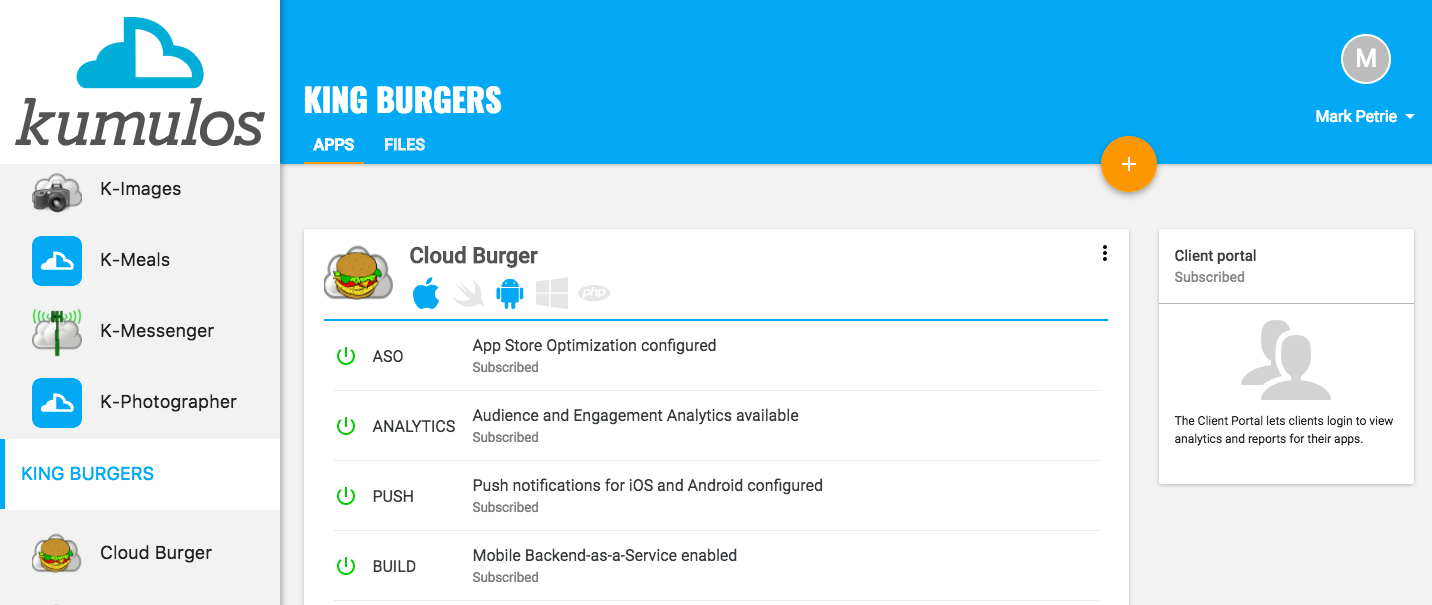
The App Dashboard
The App Dashboard shows the status of the features that have been enabled for that app as well as the API Keys required to authenticate that app. You can also access the files and links for that app.
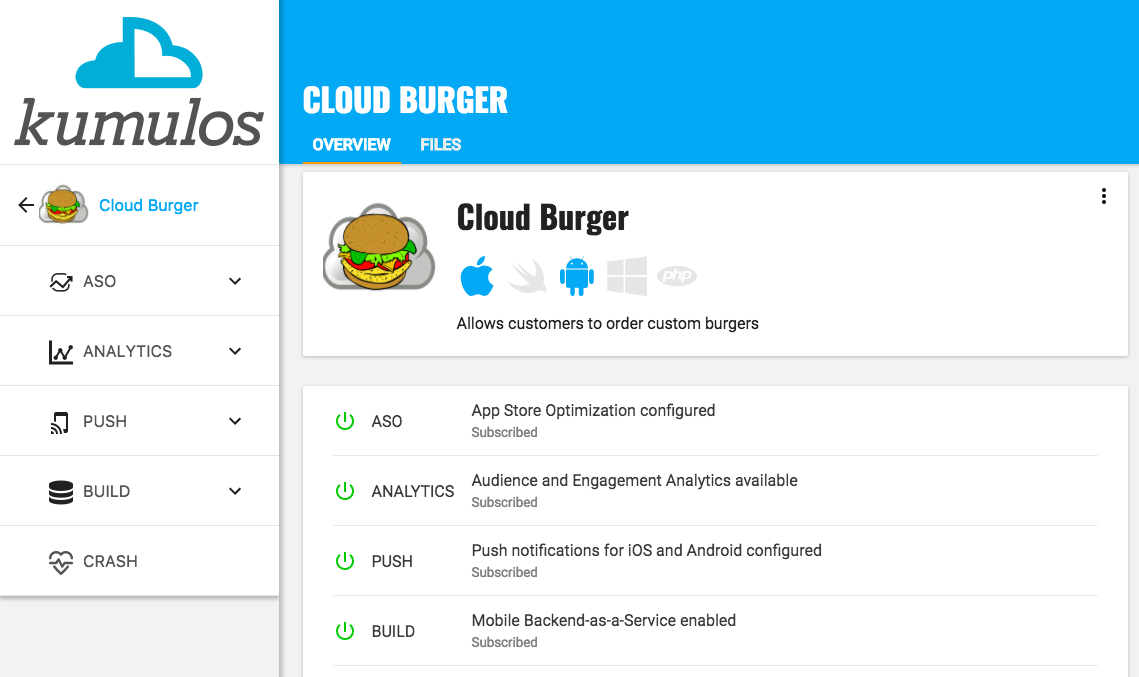
The App Dashboard will also alert you to any warning or critical problems that require your attention such as an expired APNS certificate or a new crash that has been reported.
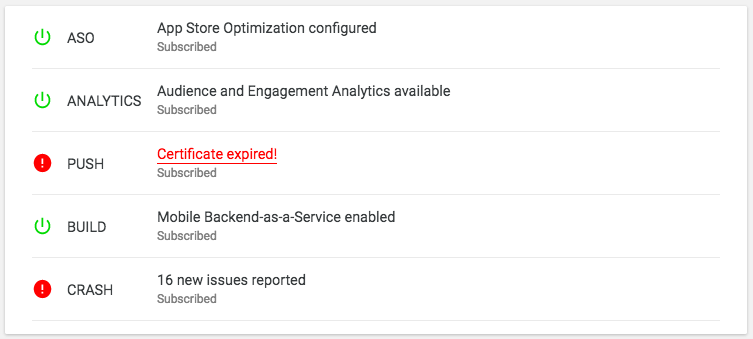
The following problems will raise an amber warning or a red critical alert.
| Feature | Alert | Reason |
|---|---|---|
| Messaging | Warning | APNS Certificate expires in under two weeks. |
| Messaging | Critical | APNS Certificate has expired. You cannot send push notifications to your iOS App! |
| Build | Warning | Latency to backend database is over 2 seconds (Hookup). |
| Build | Critical | Unable to connect to backend database (Hookup). The app cannot download new content and data! |
| Diagnostics | Warning | One or more issues remain in an open state. One or more API Endpoints has partial disruption. |
| Diagnostics | Critical | One or more issues remain in the new state. A new crash has occurred and requires urgent investigation! One or more API Endpoints has an outage. A key service that the app relies on to function has a problem! |
Enabling features for Apps
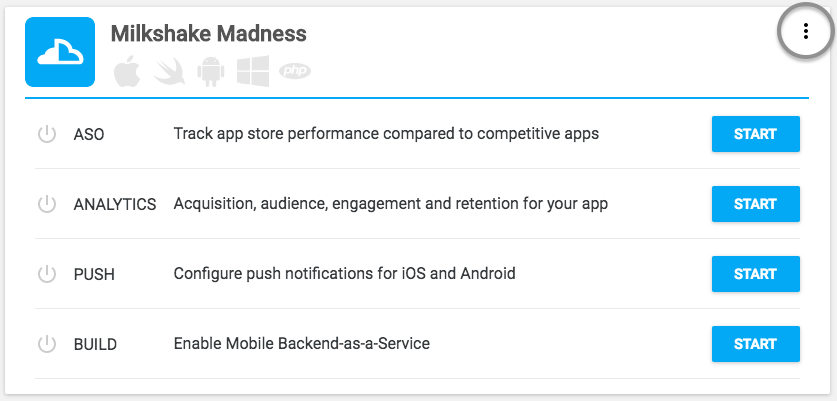
Starting a 30 day free trial
Kumulos features are free to use on up to 25 test devices for up to 30 days while your app is in development. To trial a feature for an app, click the Start button on the app dashboard next to the required feature.
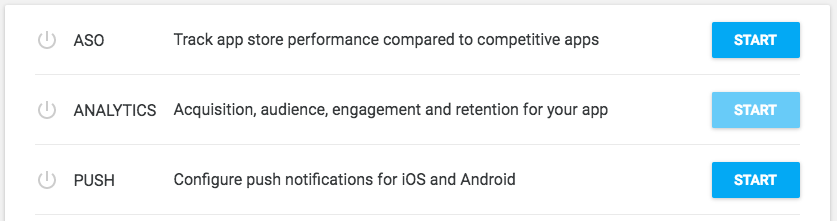
You will now see some more information about that feature.
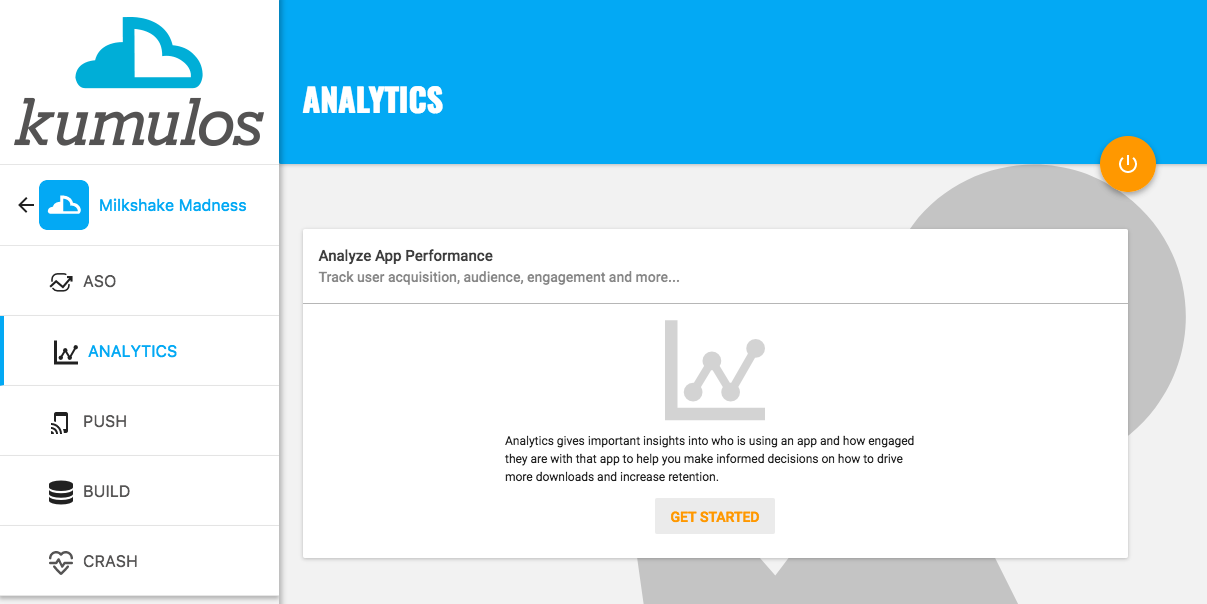
If you wish to continue click Get Started or Enable. You will be asked to confirm that you wish to begin a 30 day free trial.
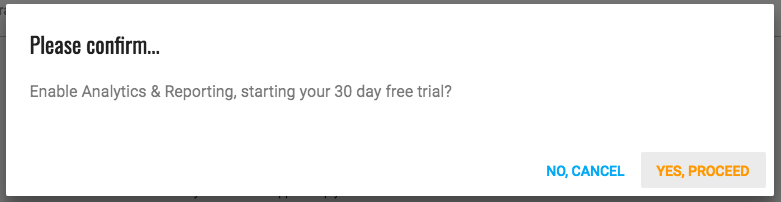
Click Yes, proceed when prompted. The setup process for that feature will now start. For further details, refer to the documentation for that feature. For example Analytics.
Adding features to your subscription
When trialling features, the app dashboard will show you how many days of your trial you have left.

To add a feature to your subscription, click Buy. You will be asked to confirm that you wish to add the feature to your subscription. At the same time, you can also buy any other features currently being trialled by checking the appropriate box. Any features already subscribed will also be shown.
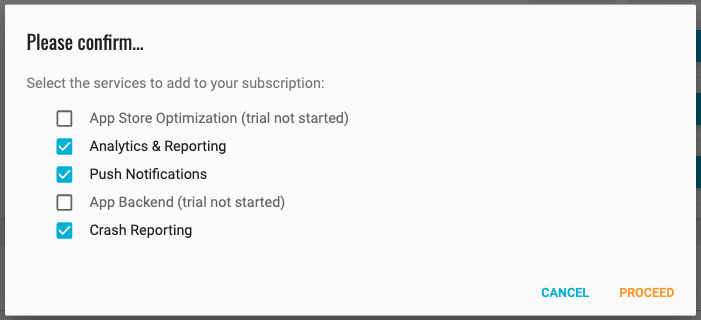
Check any other features that you want to buy and click Yes, proceed. If this is the first feature you have bought, you will need to create a billing subscription by adding payment card details.
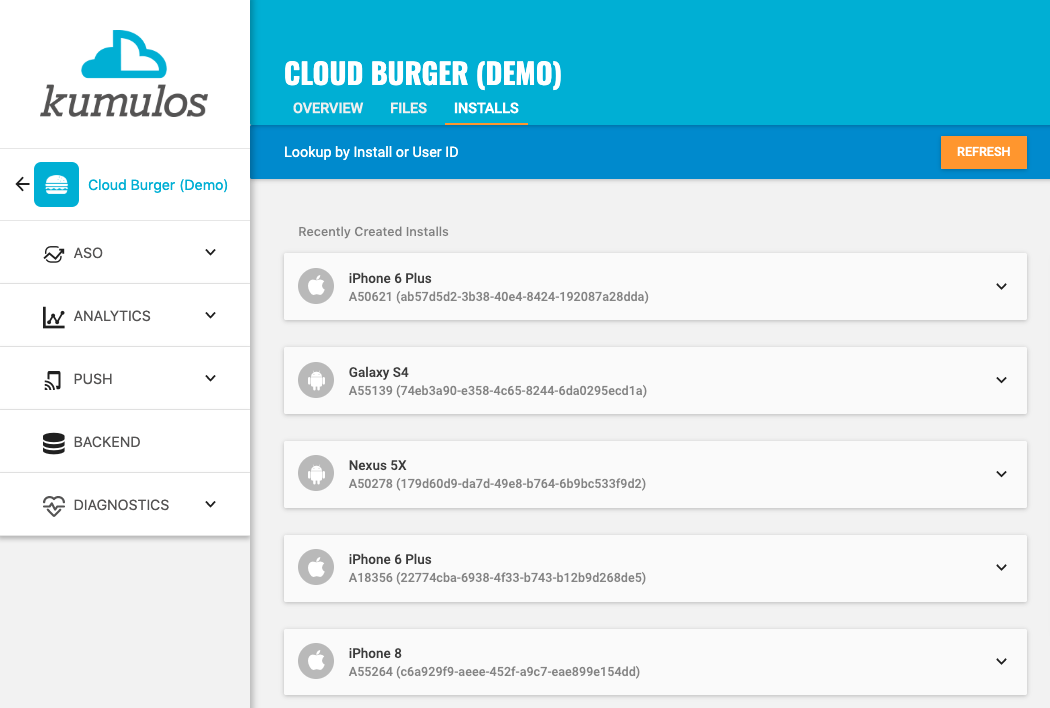
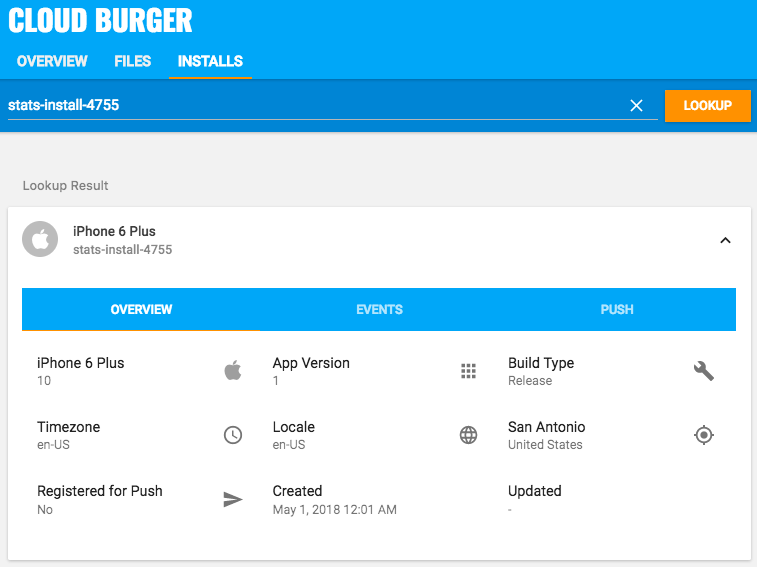
Checking installs of your App
When you integrate an SDK into your project and run your app on a simulator or install your app on a device, a unique installation id is generated and Analytics data is sent to Kumulos. To check that the SDK has been initialized correctly, select the app and then click on the Installs tab. This will show the most recent installs of your app (platform, device model and installation id).
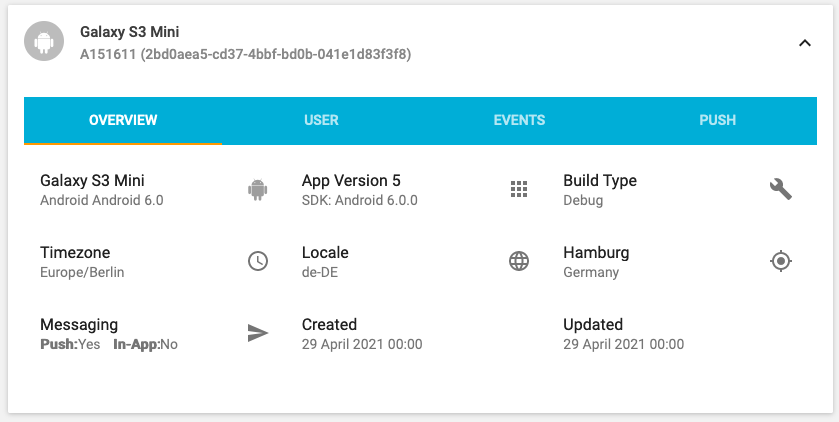
Install Overview
Click on any install to see more information. The Overview tab shows more details about the installation including app version, when the app was installed, the approximate location (to help identify test devices and installs) and the locale being used. It will also show if the install has successfully registered for push notifications.
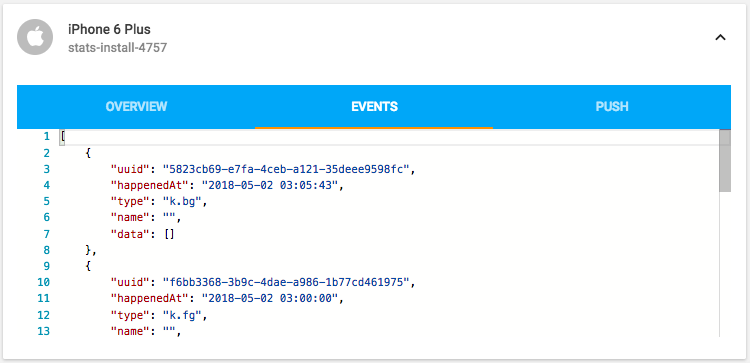
Analytics Events
The Events tab will list recent analytics events that have been sent by the app, including system events such as opened a push notification, and custom analytics events.
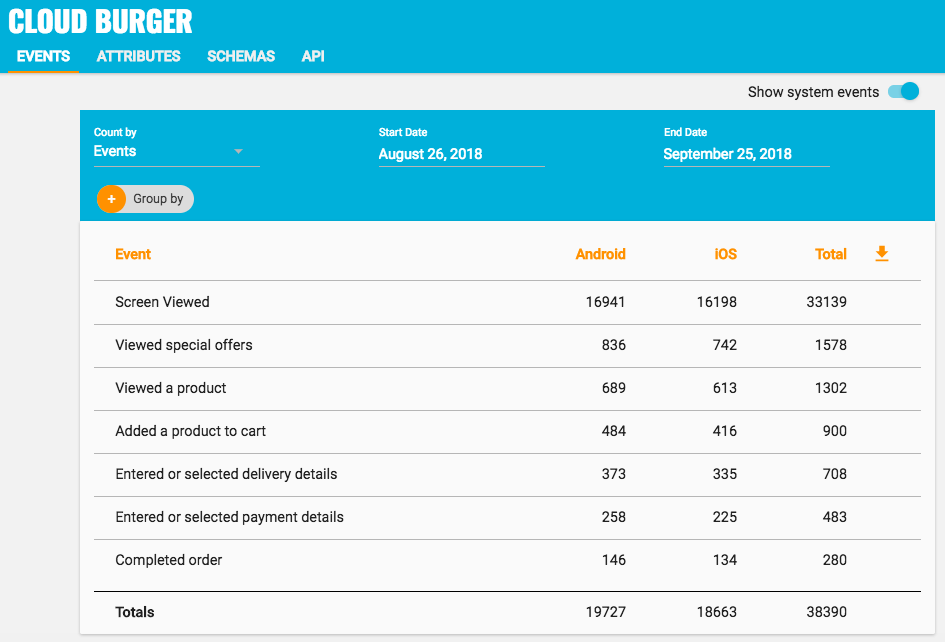
To see counts of all analytics events, including system events such as opened a push notification, recorded by installs of the app in the last 30 days, expand 'Analytics' and click 'Explore' in the left menu. For comparison, the total number of sessions in the same period is shown.
Push Notifications
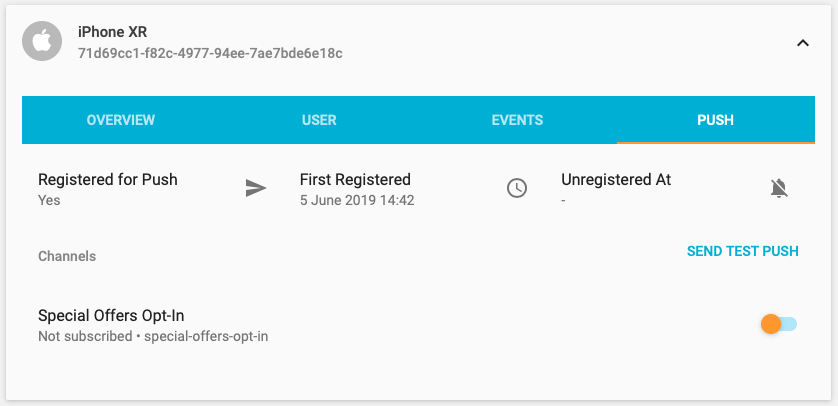
The Push tab will show if the install has ever registered for push notifications, when this happened and if the install subsequently unregistered for push notifications. If the app has registered for push notifications, you can send a test push notification. You can see which public channels the install has been subscribed to. You can also subscribe or unsubscribe the install to/from a channel.
Lookup by install id
If you are debugging an issue, you can lookup an install by its installation id by typing this in the search box and clicking Lookup.
Launching your App
Kumulos features are free to use on up to 25 test devices for up to 30 days while your app is in development. After this, you must either switch features off or add features to your subscription to remove these device and time-based limits (and also allow you to create a staging environment for your app).
This should be done prior to store submission (so that your app is not rejected due to exceeding device or time-based usage limits during the approval process).
If this is the first feature you have bought, you will need to create a billing subscription by adding payment card details.
Suspending an App
Should you wish to temporarily disable all features for an app without changing their configuration (for example: if there is a billing dispute with a client), you can suspend an app. While viewing the app from the client or app dashboard use the context action and select "Suspend"
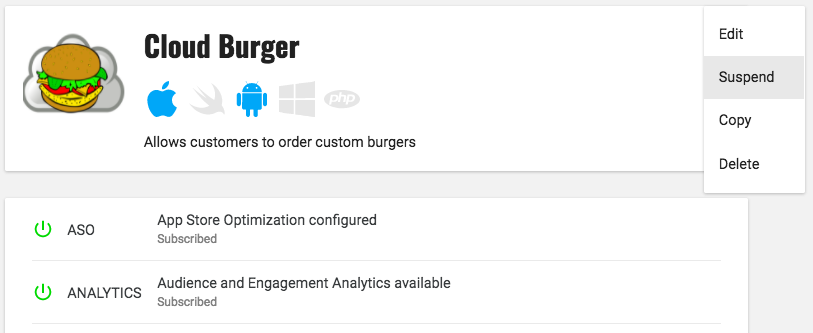
As this will cause all features to stop working, you will be asked to confirm.

When you click confirm, the app will now be suspended and all features will stop functioning.
This will not automatically adjust your subscription. Please contact us if you wish to do so.
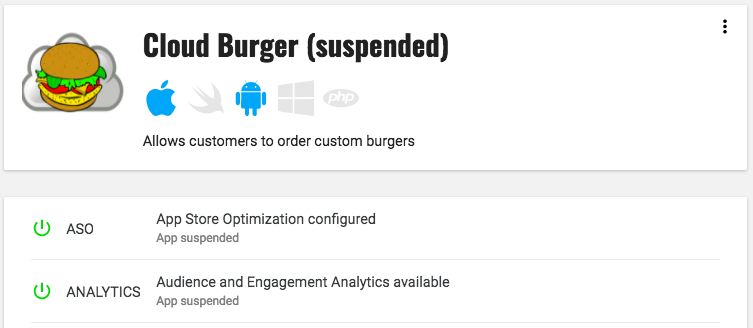
- New analytics installs, sessions and events will not be registered
- New push installs will not be registered
- Push Notification API calls will fail
- ASO keyword rankings will cease
- Crash reports will be ignored
- Build API calls will fail
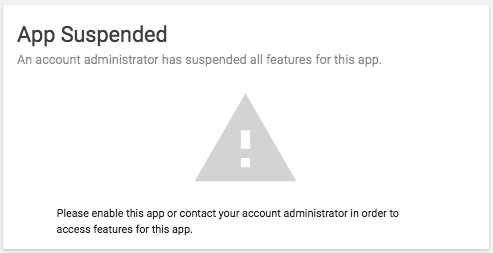
When you (or your client) attempts to access any feature, the following message will now be shown.
Re-enabling a suspended app
When you wish to un-suspend an app and re-enable all features, while viewing the app from the client or app dashboard use the context action and select "Enable"
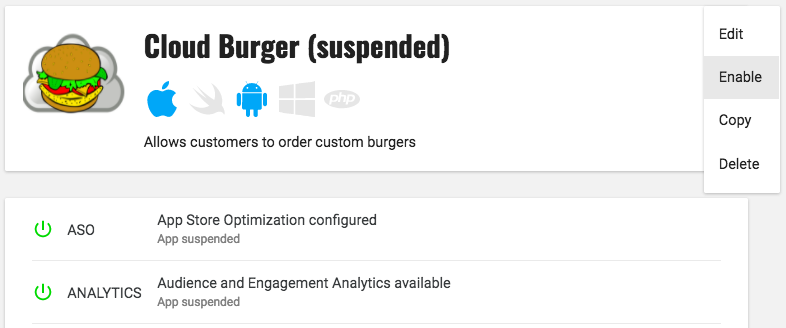
This will resume all features to their previous configuration and so you will be asked to confirm.

When you click confirm, all features will be enabled.
Creating a staging environment
If you have enabled and bought the App Build Mobile Backend-as-a-Service feature, it can be useful to create complete copies of the app so that bugs can be fixed on a test version, or new features can be added in a staging version of an existing app. This can be accomplished for any app for which the App Build Mobile Backend-as-a-Service feature has been bought.
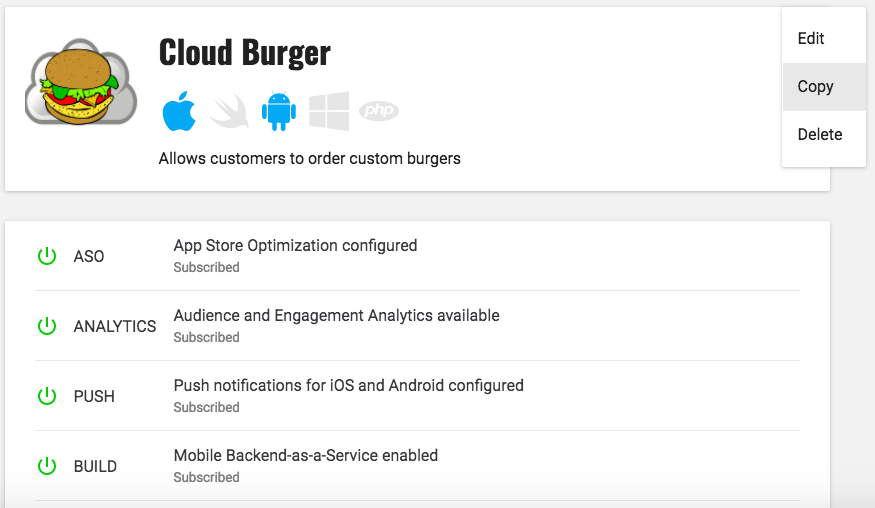
While viewing the app from the client or app dashboard use the context action and select "Copy"
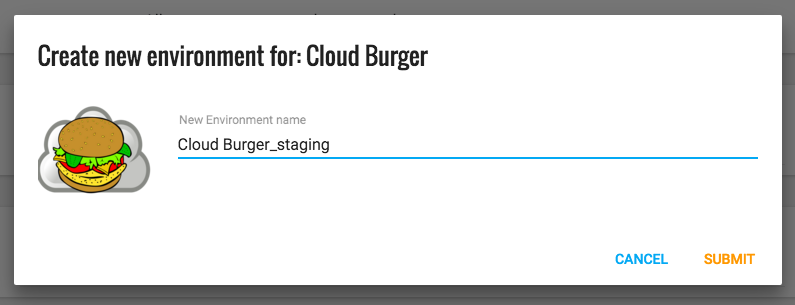
The create environment dialog will appear, prompting for a name for the new copy of the app. The suggested title will append '_staging' to the current app name. Click 'Submit' to start the copy process.
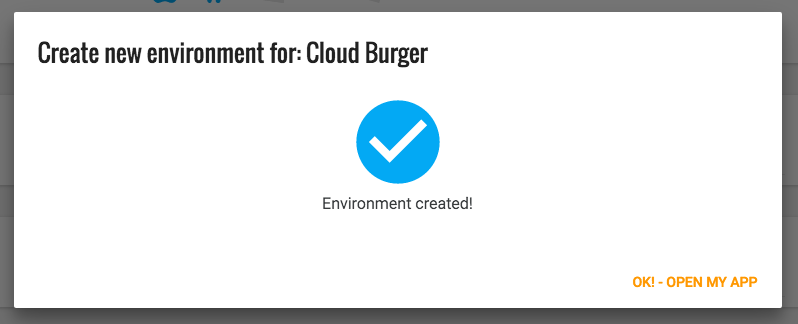
Once the process has completed the dialog will provide feedback and a link to the newly created app, simply click the button to open its dashboard.
You must deploy the API methods for the newly created staging environment before they can be called by a mobile app. Also, remember that if you want a mobile app to now use the staging environment, you will need to use the API key for that staging environment.
Finally, if you want to promote any changes to API Methods from a staging environment to your live app, then please contact support who will be happy to do this for you.