Web Push Notifications
Configure Web Push Prompts
If you haven't already you will need to add our Web SDK to your site in order for the configuration to function, however you can still configure push prompts in the dashboard in advance of adding the SDK.
To configure when and where to prompt website visitors to subscribe to web push notifications, expand 'Messaging' in the left menu, select 'Configuration'
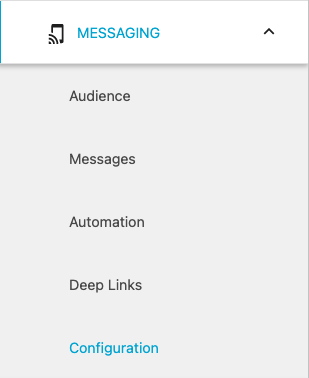
then the 'Web Push' tab

From this tab you will be able to add rules controlling where you want web push prompts to be shown on the site and add specific actions. This can be used in order to add subscribers to a channel according to the location on the site. Click 'Add' to create a rule.

You can add multiple prompts with different labels and appearances on different pages.
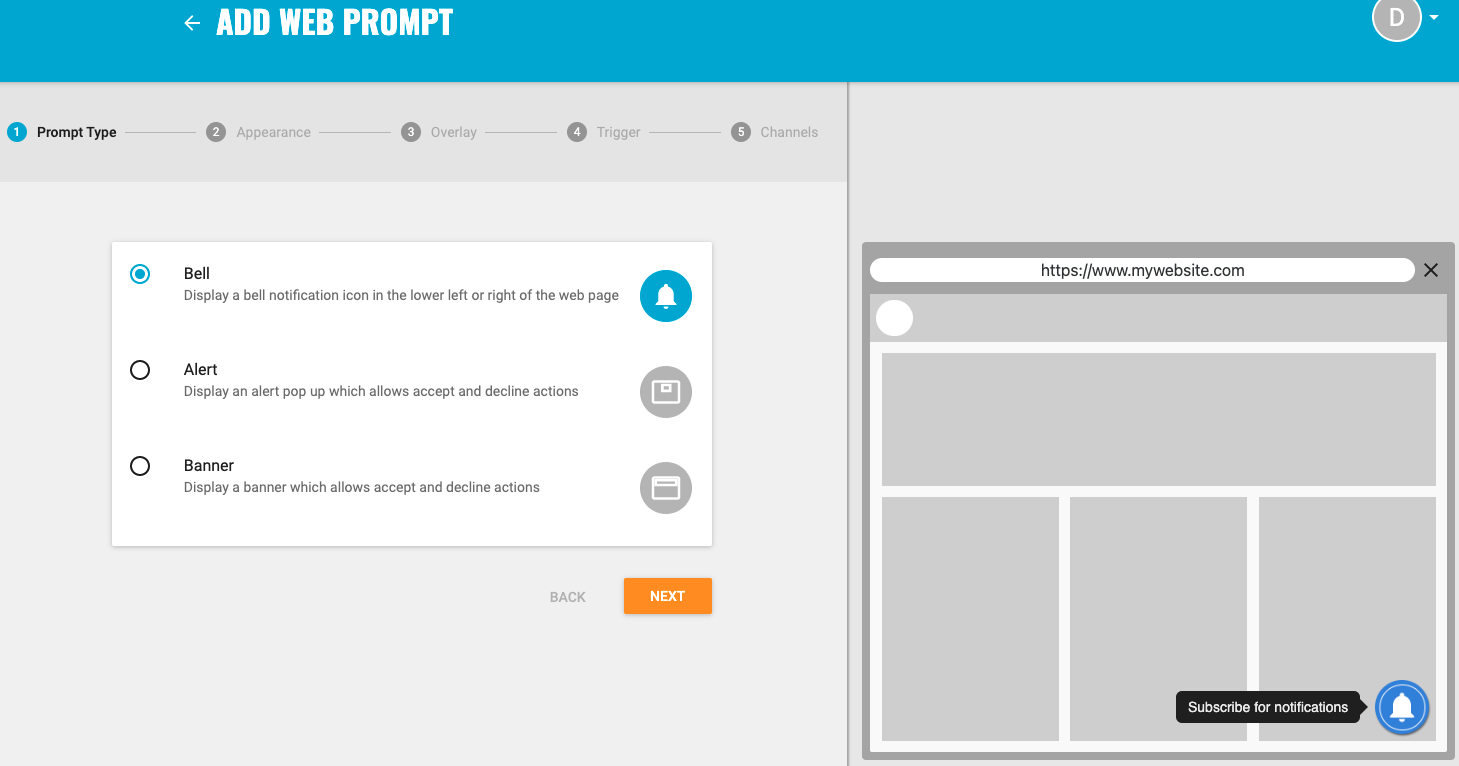
Prompt Type
When you create a new Web Push Prompt there are 3 prompt types to choose from and a preview wizard that shows what these will look like as you customize them. You can select a bell prompt:
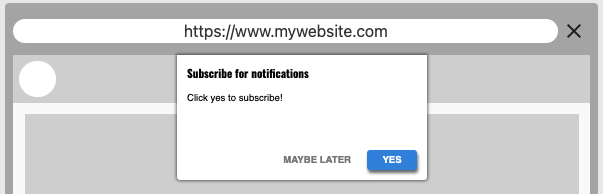
An alert which appears at the top of the page:
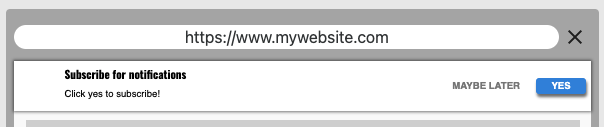
or a banner at the top of the page:
You can add multiple push prompts however you can only configure one at a time. Press 'Next in order to continue customizing.
Appearance
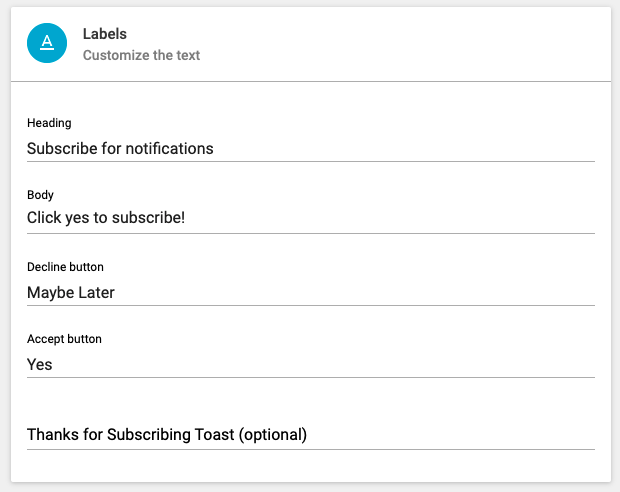
You can customize the text that will be displayed for alerts and banners or what will be shown when the user hovers over the bell prompt.
The options for customizing labels will vary based on the prompt type selected in the previous screen as a bell prompt has less text to customize.
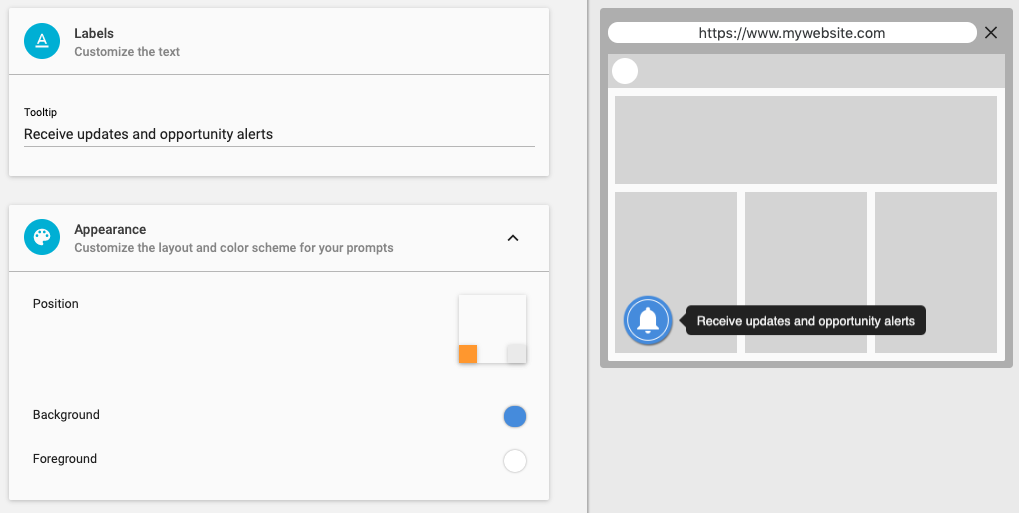
Expand 'Appearance' to customize the layout and color scheme for your prompt.

For bell prompts you can position the prompt in the bottom left or right hand corner and change the background and foreground colors. As you do this, you can see a preview of how the prompt will look.
For alerts and banners you can customize the colors for every element of the prompt, there is also an option to mask the website until the user has accepted or declined the prompt which can be toggled if desired.
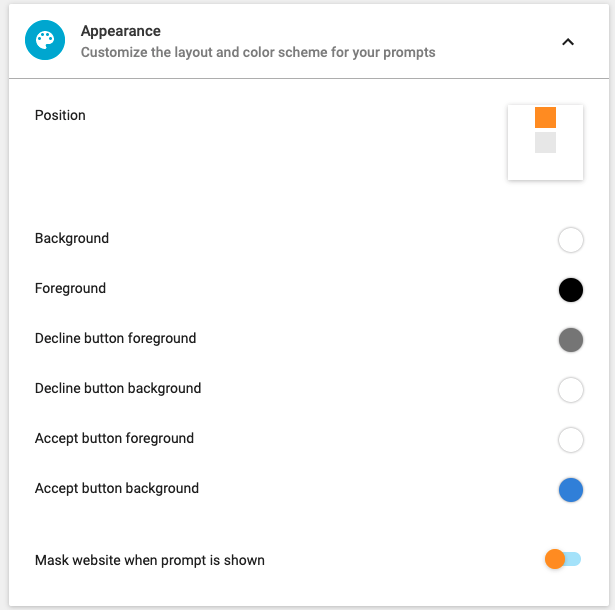
Click 'Next' to continue customizing the prompt.
Overlay
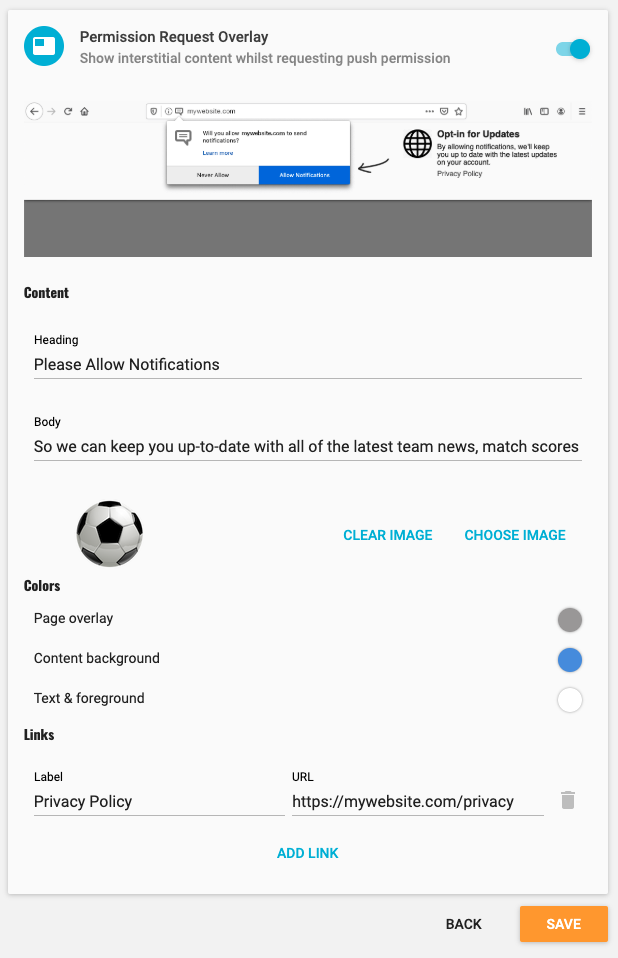
To boost subscription rates, you can show some interstitial content whilst the browser is requesting push permission. Toggle 'Push Request Overlay' and enter a Heading and Body for the overlay.
Choose an Image
Click CHOOSE IMAGE to open your media library. Here, you can upload a new icon or select an icon previously uploaded.
To upload a new icon, click the upload primary action button. Click 'Choose File' to browse your computer and find the icon. Select any tags to help you find the icon later or to add a new tag, just start typing and click 'Create new tag'. Click 'Upload' to add the icon to your media library and use this for the overlay.
To use an icon you have previously uploaded, simply select the icon and click the tick primary action button. You can either scroll through your library or filter by the tags you have added previously.
Colors
You can customize the colors of the mask that will overlay the page whilst the browser is requesting push permission, the background color of the overlay and the foreground color for text by clicking the appropriate color picker icon. Click 'Confirm' once you have selected the desired color.
Links
You can add links to your privacy policy, for example, by clicking 'ADD LINK'. Enter a label and the URL for the link. If you want to add another link, click 'ADD LINK' again. If you want to remove a link, click the trashcan icon next to it.
Click 'Save' to add the prompt. The SDK will now show this prompt within one hour.
To force the SDK to update its prompt configuration sooner (during testing for example), simply visit the page, remove the promptUpdated key from local storage (in Chrome Developer Tools, go to the 'Application' tab, under 'Storage' expand 'Indexed DB' and 'kumulos') and then reload the page.
Quieter Messaging Overlay
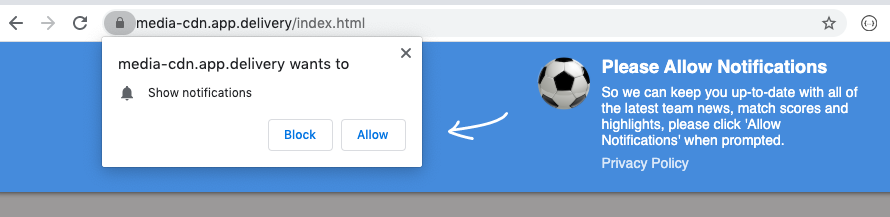
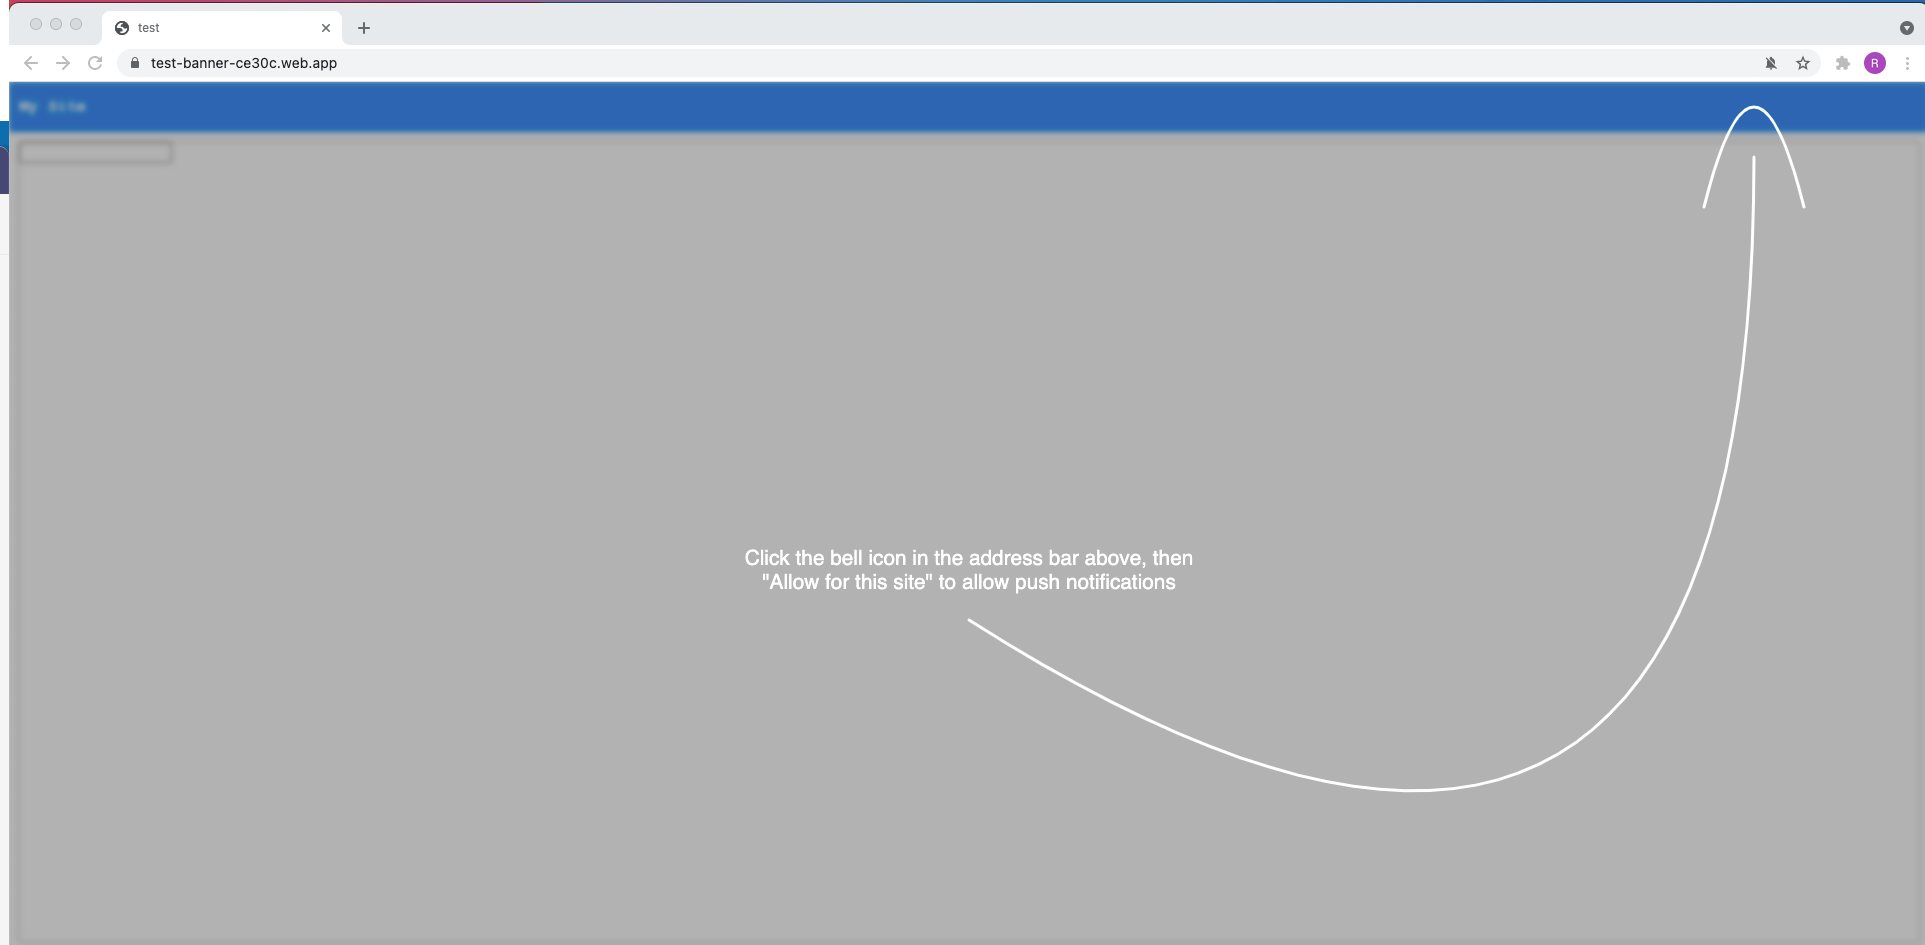
Additionally, you can display an alternative overlay to show in the Google Chrome browser for when it requests push permission if quieter messaging is active. Similarly, this will instruct to users of the web site where to click the relevant prompt to allow the push permission as shown below:
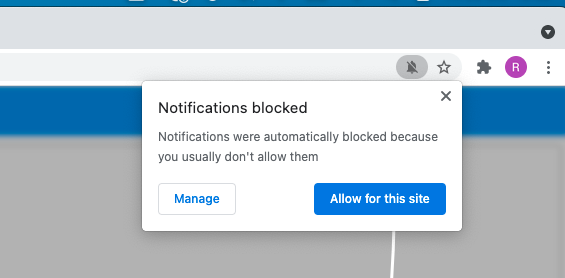
When a user clicks the blocked notification bell icon, permissions can then be given using the 'Notifications blocked' prompt which is displayed:
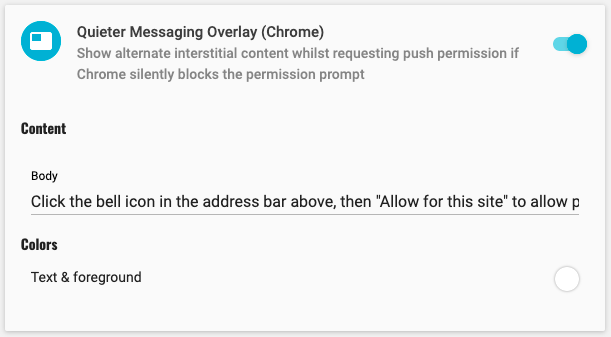
This overlay can be toggled on by enabling the 'Silent Push Request Overlay (Chrome)' panel, providing Body text as the message to display to the user and the color preference for the text and arrow indicator shown:
Trigger
First you need to select the event that should cause the prompt to show. This can be any analytics event tracked by your site (for example a product purchase event) or when some a page is viewed. You can also match properties of the analytics event (for example only a product purchased event where value exceeds a given amount) or the paths for the pages where the prompt should be shown.
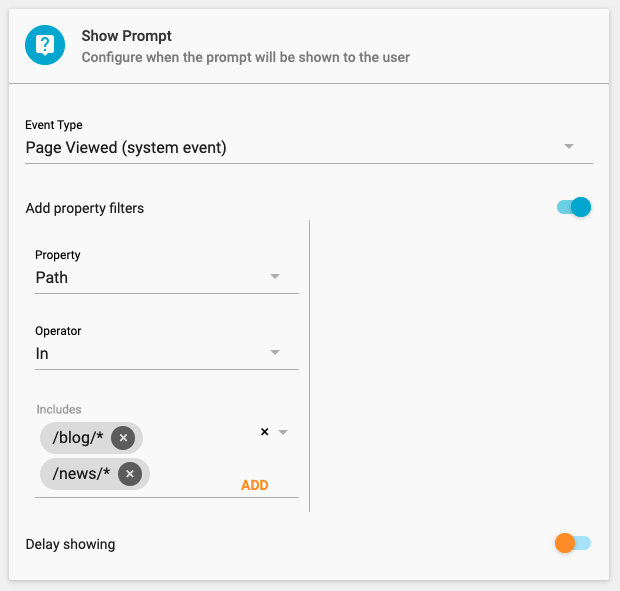
To configure a prompt to show on some or all pages, select 'Page Viewed (system event)', with the 'Path' property and the 'In' operator. Under 'Includes' add the paths for the pages where the prompt should be shown. This can be the complete path or a wildcard. For example:
- To show the prompt on every page, enter
*, click 'Create Option *' then 'Add' - To show the prompt on every where path starts blog or news:
- Enter
/blog/*and click 'Create Option /blog/*' - Enter
/news/*and click 'Create Option /news/*' - Click 'Add'
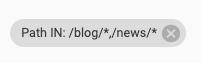
You can have multiple path options in each 'Includes', in which case the prompt will be shown if the page matches one path or another path option. For example: where path starts blog or news:
You can also 'Add' multiple 'Include' filters, in which case the prompt will only be shown if the event includes every filter (i.e. event must match filter one and filter two etc). For example: when a product is purchased from category 'merchandise' with value greater than $100 USD.
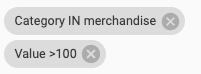
Please note if you include two paths like this then the prompt will only be shown if the page matches path one and path two. If this is not desired, click the 'x' icon to remove the filter.
If you do not want the prompt to show immediately on the page, toggle 'Delay showing' and enter how many seconds to wait before showing the prompt.
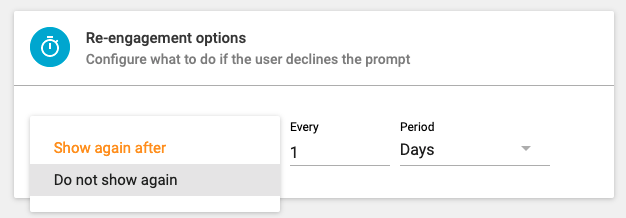
Re-engagement options
This option will allow you to configure what happens if the user declines an alert or a banner prompt and whether to show the user the same prompt again after a set time period or never to display to the user again.
Bell prompts do not have this option as there are no action buttons that are configured with bell prompts.
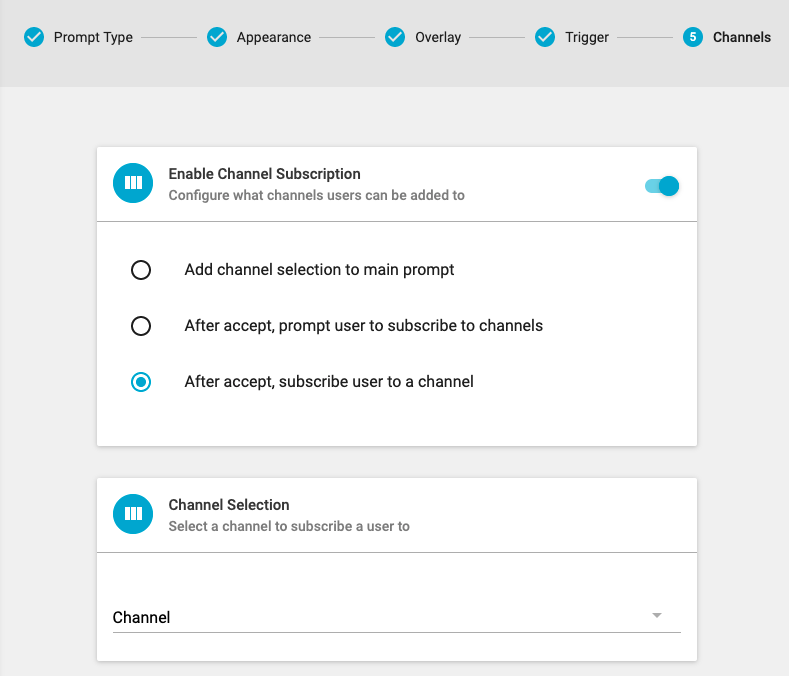
Channels
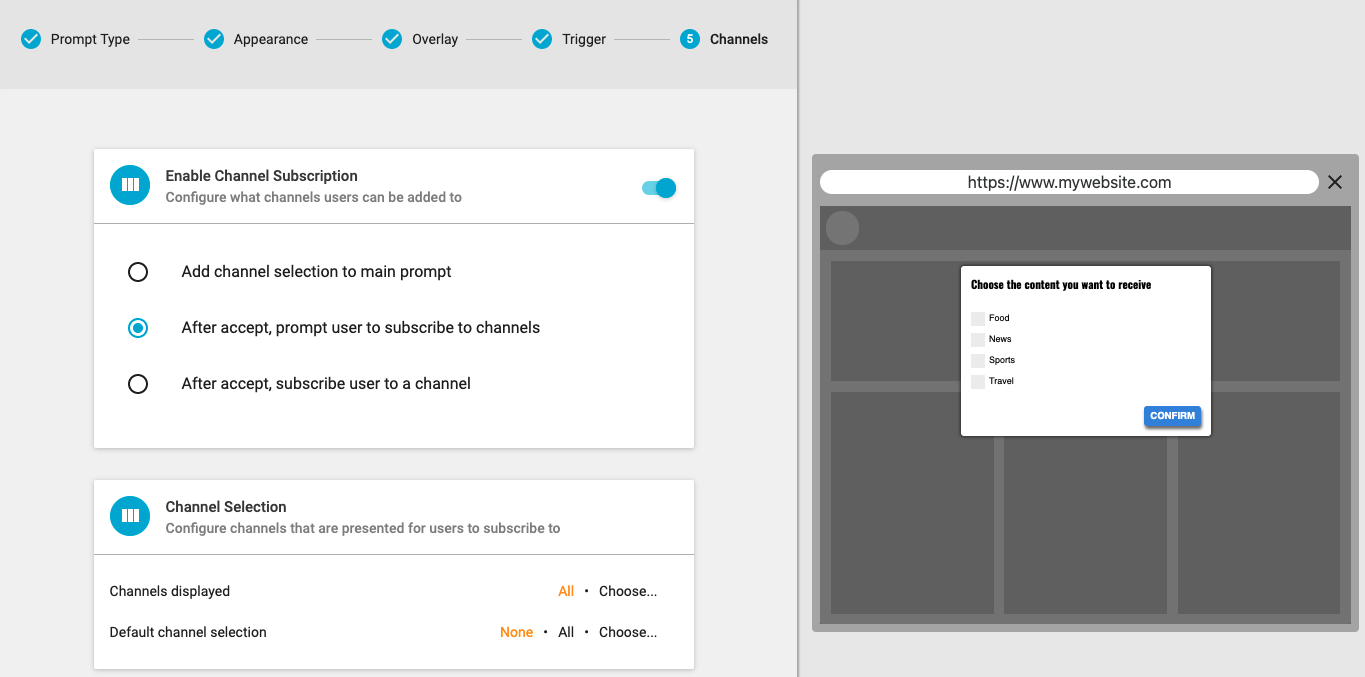
If a user accepts the prompt and registers for web push notifications you can either select which channel the user should be added to automatically or choose 'After accept, prompt user to subscribe to channels' to have the user select the channels themselves.
If you're using an alert prompt type you can have the channel selection in the push registration prompt instead of immediately after push acceptance using 'Add channel selection to main prompt'.
Alternately if you had a web push prompts configured for different areas of the website based on interest, you could configure the web prompts to subscribe users to a channel based on that interest such as 'sports' and have the trigger configured for this web prompt to only appear on these pages.
If the user is allowed to pick the channels they are subscribed to the default selection is to display all available channels within the alert and have no channels preselected by default.
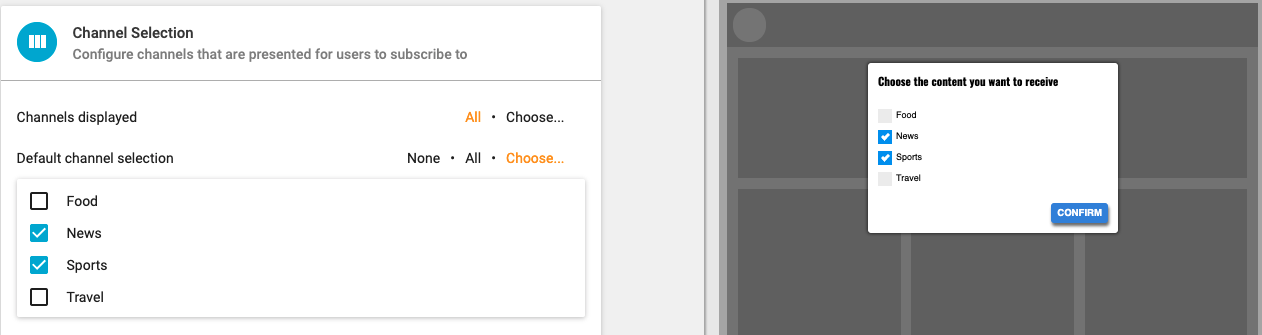
If you want to configure which channels are displayed or preselected you can click 'Choose' and select the channels as appropriate.
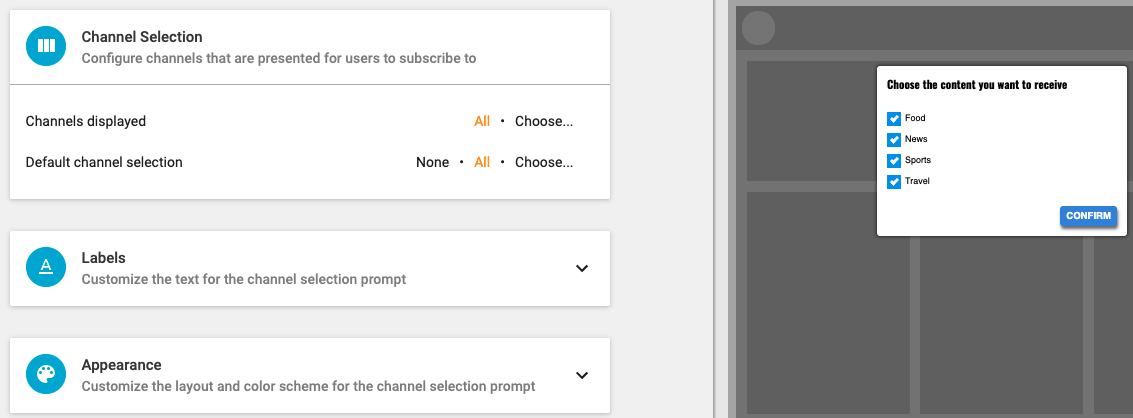
The changes will appear in the preview.
Finally, you can set the text that will be displayed for the channel selection panel by opening the 'Labels' panel, or use the 'Appearance' panel to customize the layout and color scheme.
Edit or Delete a Prompt
To edit or delete a prompt, expand 'Messaging' in the left menu, select 'Configuration' and navigate to the 'Web Push' tab, expand the context menu next to the prompt and select edit or delete as appropriate.

The SDK will update its prompt configuration within one hour.
Customize Web Push Icon
To customize the icon displayed with web push notifications, expand 'Messaging' in the left menu, select 'Configuration' and click the settings cog next to the web icon.
![]()
You can either enter the URL to the icon or use your media library. Click CHOOSE/UPLOAD ICON to open your media library. Here, you can upload a new icon or select an icon previously uploaded.
To upload a new icon, click the upload primary action button. Click 'Choose File' to browse your computer and find the icon. Select any tags to help you find the icon later or to add a new tag, just start typing and click 'Create new tag'. Click 'Upload' to add the icon to your media library and use this for your web push notifications.
To use an icon you have previously uploaded, simply select the icon and click the tick primary action button. You can either scroll through your library or filter by the tags you have added previously.
Click CONFIGURE when done.
You can override this default icon when sending a notification.
Migrating from Another Vendor
If you have previously used another web push notification system, then by default users who have previously subscribed for web push notifications from the previous system, will automatically be resubscribed to receive web push notifications from Kumulos on their next site visit with no interaction necessary.
To migrate users from your previous system to Kumulos, first you need to integrate our Web SDK to your site and add your web push prompts. It is important to do this before your subscription with your previous vendor expires.
The next step is to create campaigns in your old vendor's system targeting all users / web push subscribers (i.e. a broadcast). The specific aim of these campaigns is to get as many of the subscribers of your previous system, to visit your website (at which point they will automatically be resubscribed to receive web push notifications from Kumulos with no interaction necessary).
We would recommend doing this 2-3 times in the weeks prior to your subscription with your old vendor expiring to maximize the chance of getting as many users as possible to be automatically subscribed to receive web push notifications from Kumulos.
While you can run specific campaigns for this purpose, we would actually suggest that you just send your regular marketing and engagement campaigns from both your old vendor and Kumulos during this migration process.
Due to the way web push notifications work, users will only ever receive one notification per campaign. If they have not visited your website recently, they will receive this from our old vendor. Once they visit your website, they will then start to receive notifications from Kumulos (and not from your old vendor).
Over time, the number of users who are subscribed to receive notifications from your old vendor will fall and the number of users who are subscribed to receive notifications from Kumulos will grow. In practice, if you have an engaged, active audience, this can happen very quickly.
If you would like to discuss migrating from another vendor further, please contact support who will be happy to advise on best practice based on previous experience.
That's it! You're all set to start sending web push notifications to your subscribers! Read on to learn about your messaging dashboard, how to use segments, channels, how to send push notifications and how to create automation rules to automatically send notifications.