Send an Email via Automation
Automations allow you to use events as a trigger to fire actions. For example, you can send an email when a user enters a geofence or if a user does not complete a journey such as checkout.
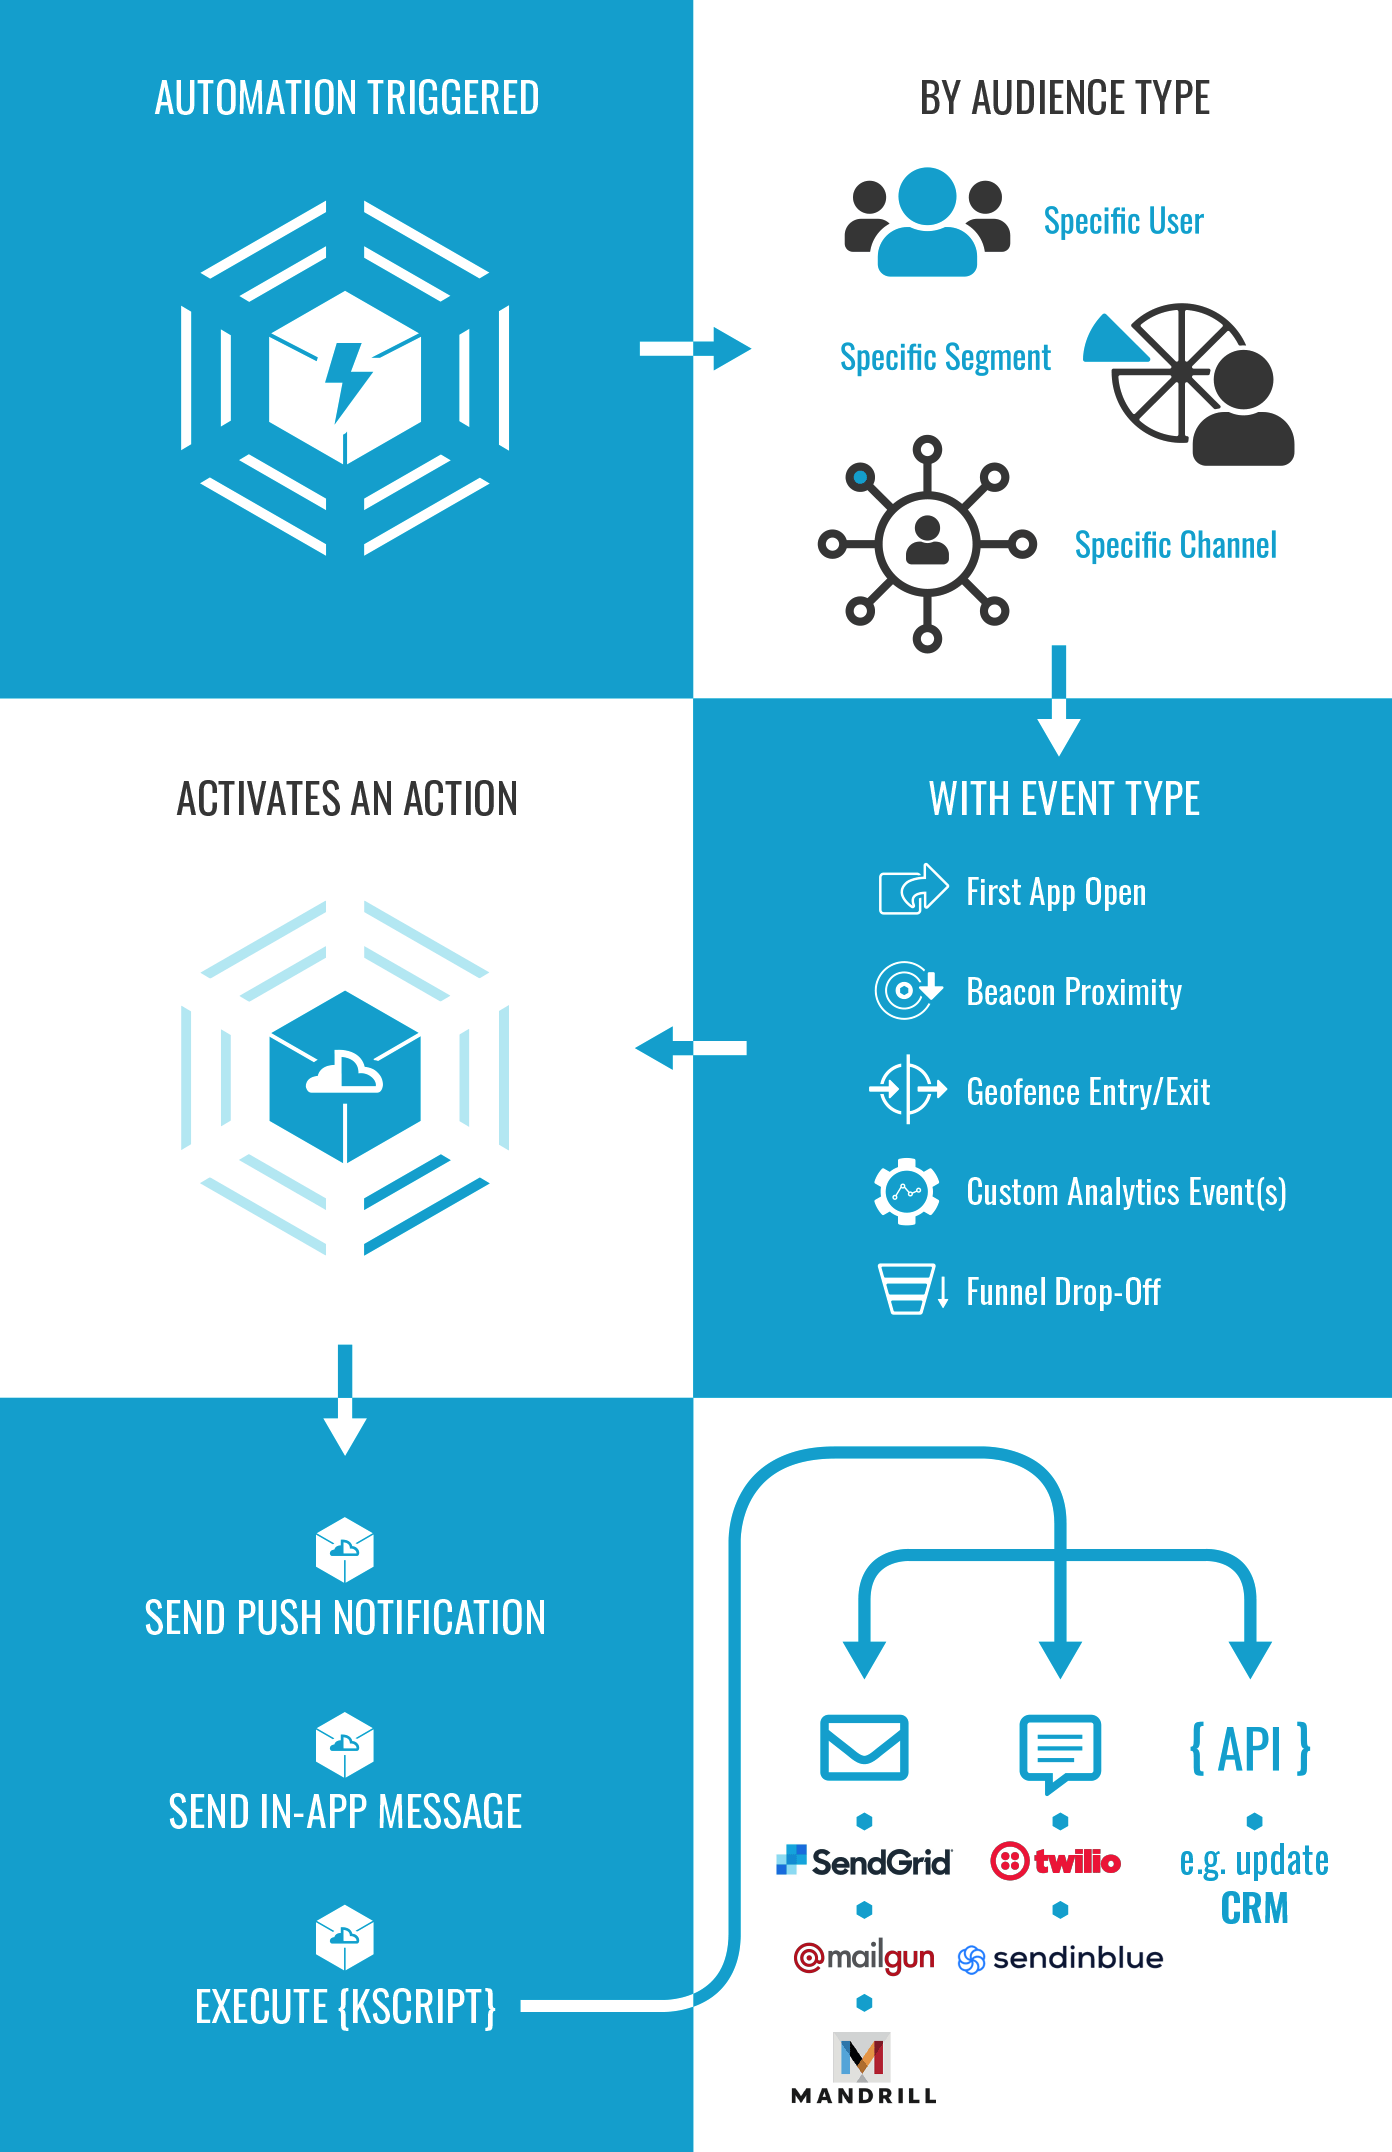
In this recipe, we'll show you how you can create an Automation that will send an Email when a custom Analytics event is tracked, using the example of a confirmation email when an order is completed. We'll assume that the user's email address and name have been stored as attributes.
This example will use SendGrid, but can be easily adapted for Mailgun, Mandrill or Sendinblue.
Ingredients
This recipe assumes that you have KScripts enabled for your app, you have a SendGrid account and that users' email addresses and names are being stored as attributes.
Recipe
This recipe consists of two parts. Firstly, creating the Kscript methods to call the SendGrid API and secondly adding an automation to fire these methods when a custom Analytics event is tracked.
KScript
Expand "Backend" in the left hand menu, select "API" and then click the "KScript" button. Create a new method called something like _mailer_ and include the following JavaScript function:
function sendEmail(from, to, subject, content) {
    var client = K.http.createClient('https://api.sendgrid.com');
    var API_KEY = 'YOUR_SENDGRID_API_KEY';

    var headers = {
        'Authorization' : 'Bearer ' + API_KEY,
        'Content-Type': 'application/json'
    };

    var data =  {
        "personalizations": [{
            "to": [{
                "email": to
            }]
        }],
        "from": {
            "email": from
        },
        "subject": subject,
        "content": [{
            "type": "text/plain",
            "value": content
        }]
    };

    var result = client.post('/v3/mail/send', K.JSON.stringify(data), headers);

    if (failed(result)) {
        K.log(result.error);
    }
    else if (result.isError()) {
        K.log(result.getBody());
    }

    return result;
}
If you wish to use a different email service, see the Mailgun and Mandrill integration guides
Now, create another Kscript method called sendConfirmationEmail and paste in the following:
//
// Include email helper function
//
include("_mailer_");

//
// Check we have all of the required parameters and
// we are only being called from an automation
//
// {
//     params : {
//         "installId" : "uuid",
//         "userId" : "identifier",
//         "triggerEvent" : {
//             "uuid" : "uuid",
//             "eventType" : "k.engage.geofenceEntered",
//             "happenedAt" : "DateTime::RFC3339_EXTENDED",
//             "data" : {
//                 "geofenceId" : 123
//             }
//         }
// }
if (!K.params.has("userId")) {
    throw ("Missing user id");
}

if (!K.params.has("triggerEvent")) {
    throw ("This script is intended for use with automations only");
}

//
// Check we have an email address for the user
//
var attributes = K.users.getAttributes(K.params.userId);
if (!attributes.has("email")) {
    throw ("User does not have an email address.");
}

//
// Personalize the greeting if we have their name
//
var greeting = "Hi";
if (attributes.has("name")) {
    greeting = attributes.get("name")
}

//
// Send an email
//
sendEmail(
    "[email protected]",
    attributes.get("email"),
    "Thank you for your recent order",
    greeting + ", sit tight - your order is being processed."
);
Finally, click the "Deploy" button to deploy your KScript methods to our API Servers.
Automation
Now we can add our automation. Automations are comprised of an availability period (e.g. for time-limited promotions) and one or more rules. Each rule is in turn comprised of a trigger (audience and event) and one or more actions (e.g. running a KScript).
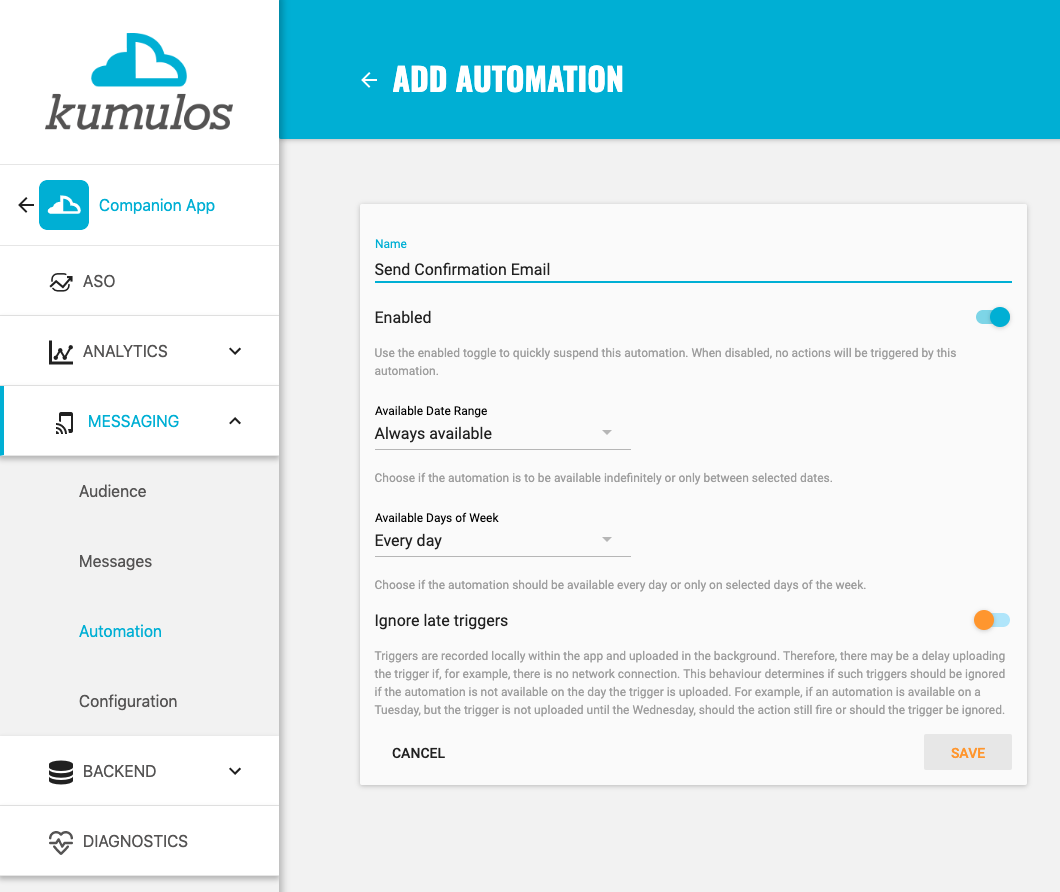
To add an automation, expand "Messaging" in the left menu, select "Automation" and then click the primary action button. Give the automation a meaningful name and click "Save" so we can add a rule.
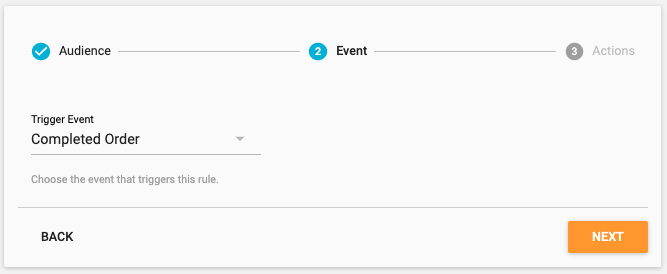
To add a rule to the automation, click the primary action button. The trigger is comprised of audience and an event. We're not going to limit the audience of this trigger any further, so just click "Next".
Now, from the trigger event drop-down, select the custom analytics event that is to be used to trigger this rule and click 'Next' when ready to add actions to the rule.
Select the sendConfirmationEmail method from the KScript dropdown and click "Done" to add the automation rule.
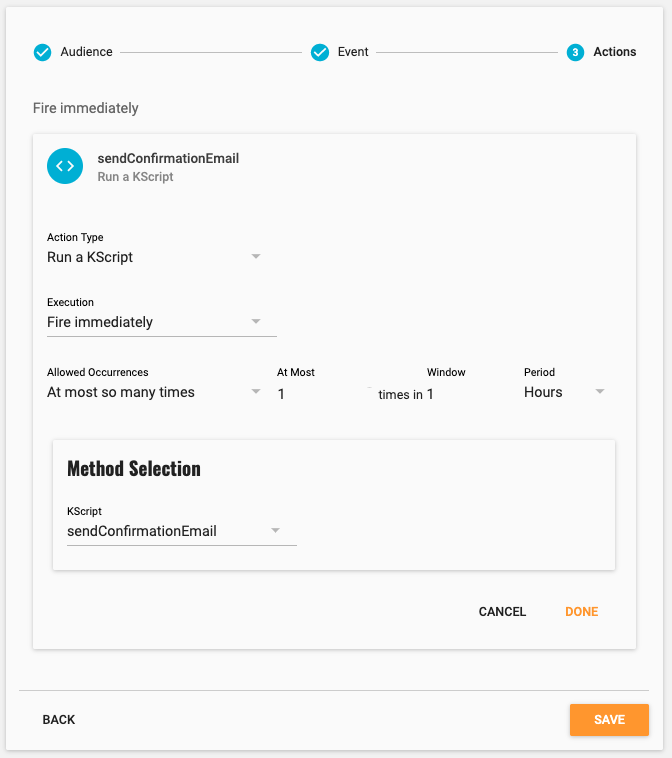
That's It! Now, when a user completes their order, sending the custom analytics event to Kumulos, the KScript method will send a confirmation email to the address stored in the user's attributes.
Further reading
Please see KScript docs for a full function reference and Automation docs for more details on triggers and actions.