Automation
Automations allow you to use events as a trigger to fire actions. For example, you can send a push notification when a user enters a geofence or if a user does not complete a journey such as checkout.
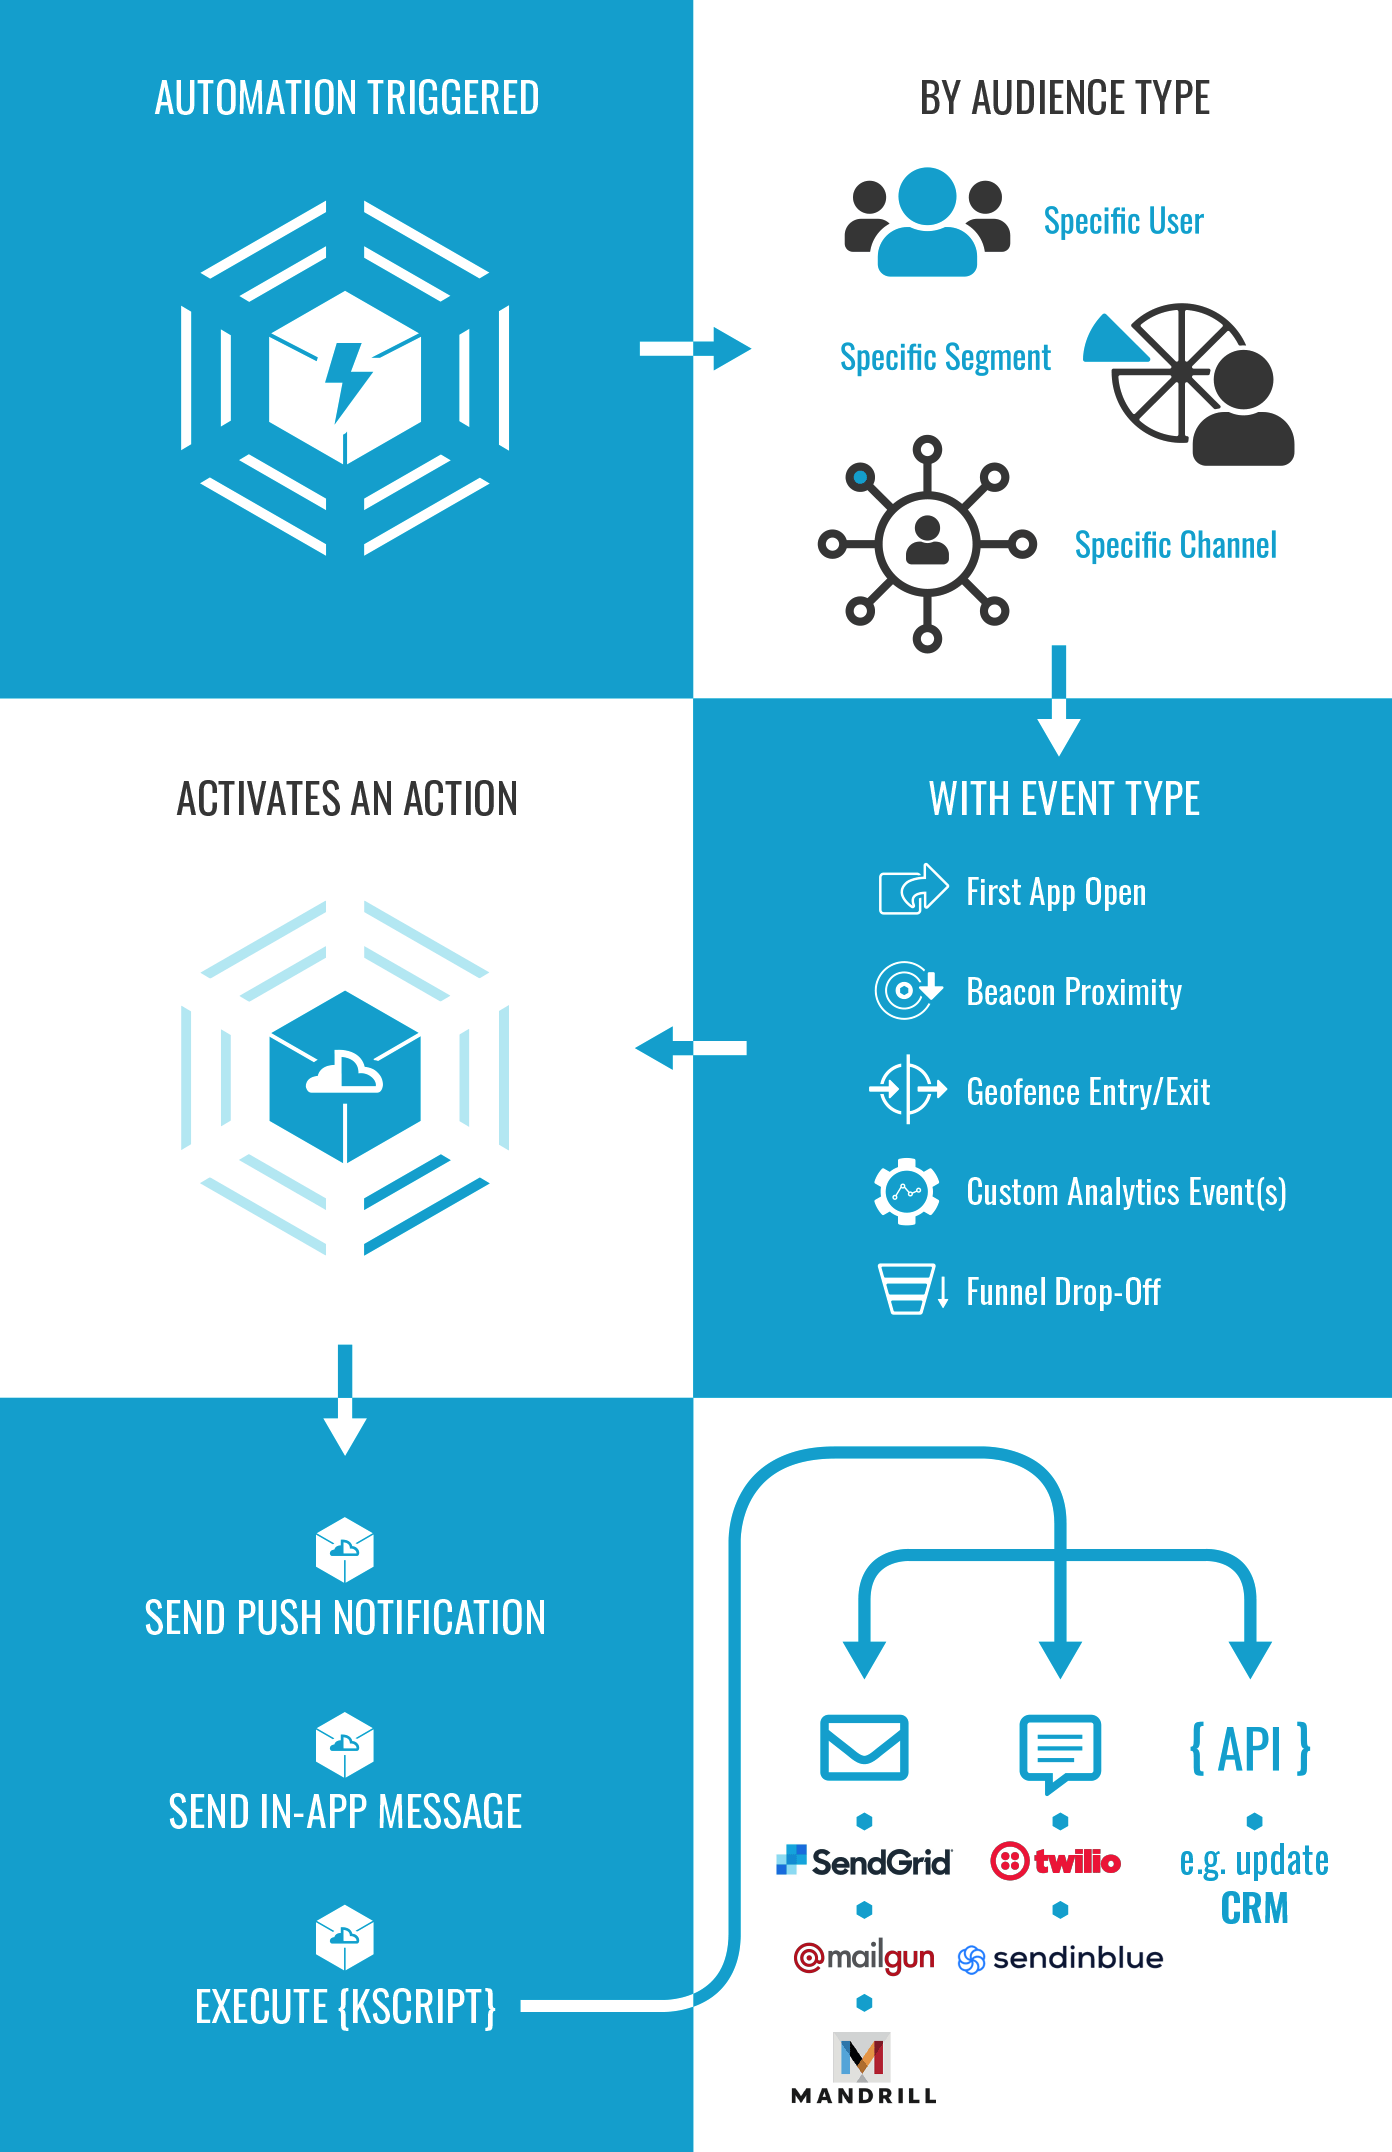
An automation is comprised of an availability period (for time-limited promotions) and one or more rules. Each rule is in turn comprised of a trigger (audience and event) and one or more actions (e.g. send a push notification or running a KScript).
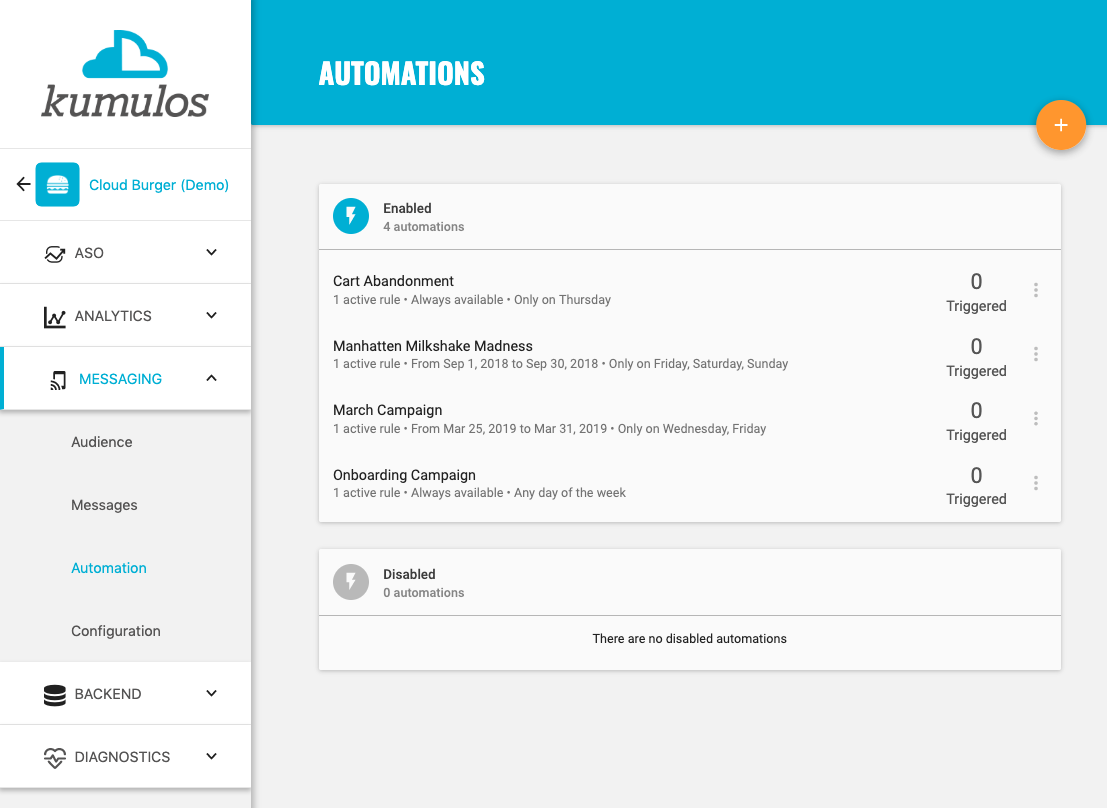
To add, edit and delete automations for an app, click on the app and then expand "Messaging" in the left menu and select "Automation". Next to each automation, you can see how many times the rules for that automation have been triggered. In other words, on how many occasions installs in the specified audiences, has completed the selected events within the availability period of the automation.
To Edit or Delete an Automation, click the context menu next to that Automation and select "Edit" or "Delete" as appropriate. You can also quickly add a rule to an existing automation from this menu.
Click the primary action button to add a new Automation, set the availability period and add rules...
Adding Automations
First, give the automation a meaningful name.

The "Enabled" toggle allows you to quickly suspend this automation. When disabled, no actions will be triggered by this automation.
Availability period
Next, define the availability period of the automation.
Date range
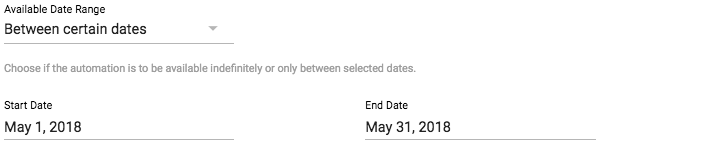
If the automation is to run between specific dates only, click the "Available date range" drop-down and change "Always Available" to "Between certain dates" then enter a start and end date for the automation.
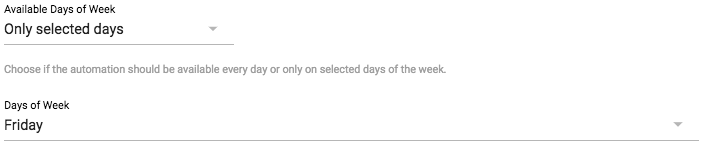
Days of week
If the automation is to run on specific days of the week, click the "Available days" drop-down and change "Every day" to "Only selected days" then click the "Days of week" drop-down and select one or more days.
Late Triggers
Triggers are recorded locally within the app and uploaded to Kumulos in the background. Therefore, there may be a delay uploading the trigger if, for example, there is no network connection. The "Ignore late triggers" toggle determines if Kumulos should ignore triggers if the automation is not available on the day the trigger is uploaded. For example, if an automation is available on a Friday, but the trigger is not uploaded until the Saturday, should the action still fire (default) or should the trigger be ignored (in which case, enable the "Ignore late triggers" toggle).
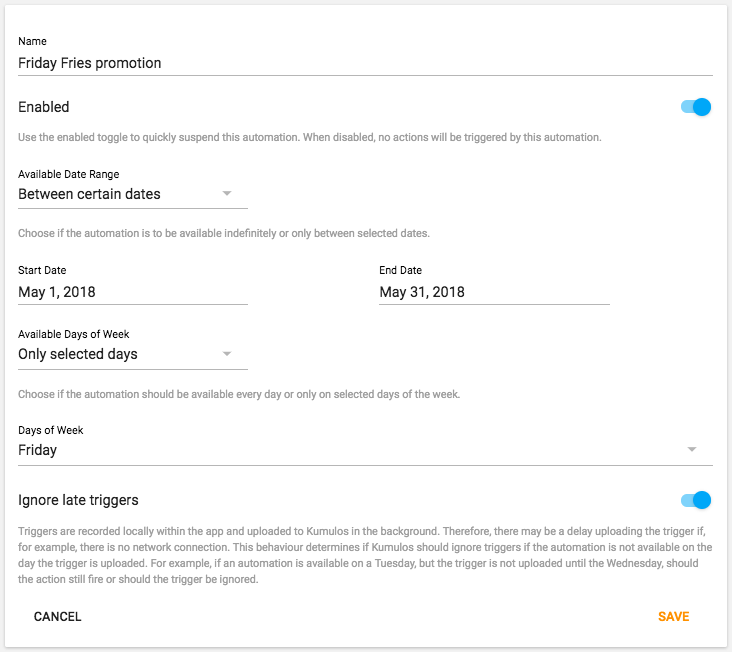
Click "Save" when done to add rules to the automation...
Adding Rules
An automation can have one or more rules. Each rule is comprised of a trigger (audience and event) and one or more actions (e.g. send a push notification).
Add multiple rules (with different triggers) to send different content to different users by either varying the audience (segment and channel) or by changing the event (geolocation).
Add multiple actions to a rule to send multiple notifications to your audience once they have triggered the rule (e.g. a drip-feed marketing campaign).
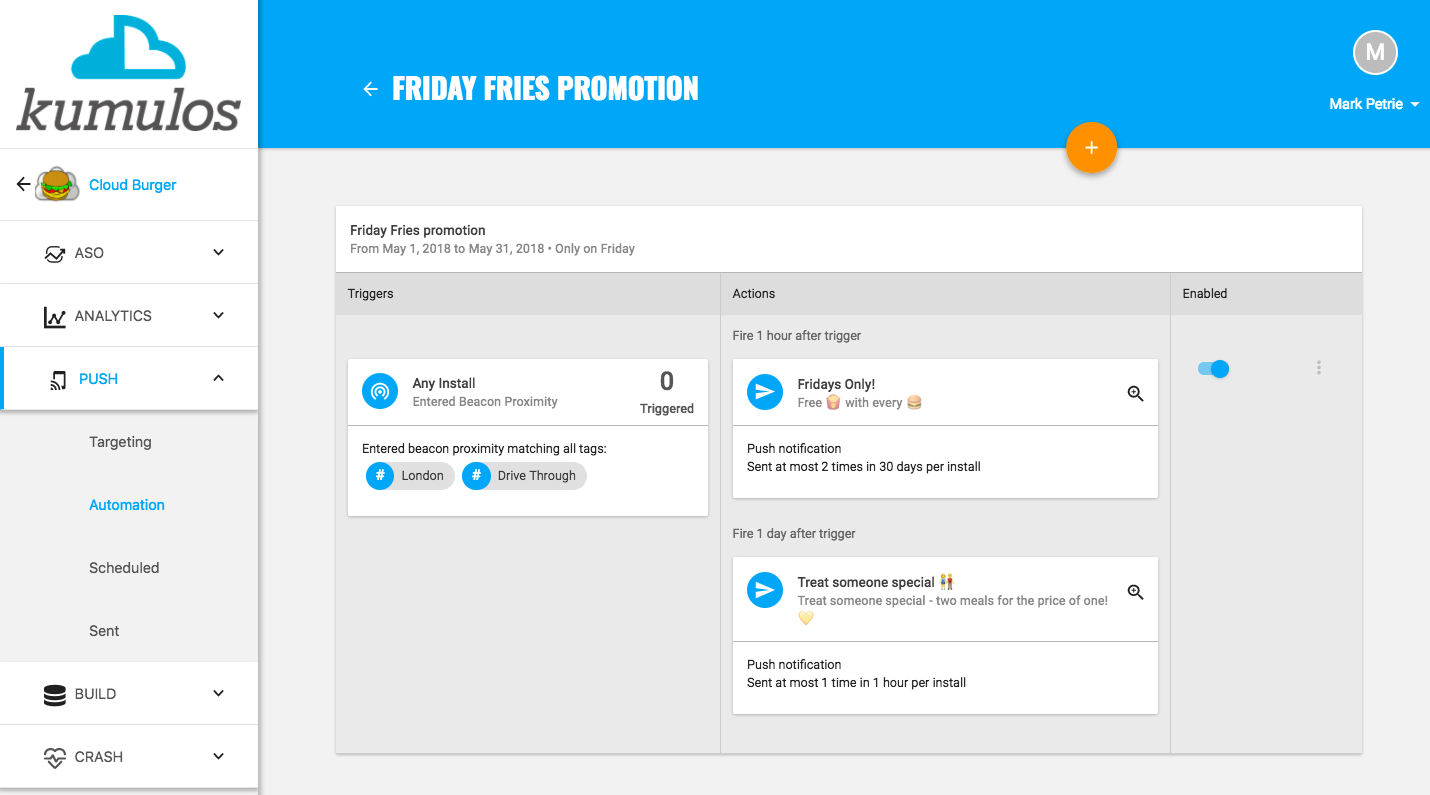
Next to the trigger for each rule, you can see how many times the rule has been triggered. In other words, on how many occasions an install in the specified audience, has completed the selected event within the availability period of the automation.
The "Enabled" toggle provides a quick way to disable a rule. Disabled rules will not cause any actions to be fired.
To edit or delete a rule, click the context menu next to the rule and select "Edit" or "Delete" as appropriate. To preview how a notification will appear on a user's device, click the magnifying glass.
To add a rule to an automation, click the primary action button.
Trigger
A trigger is comprised of audience and an event.
Audience
First specify the audience that can trigger this rule. Either any install subscribed to receive push notifications or only installs within a specific segment and/or subscribed to a specific channel.
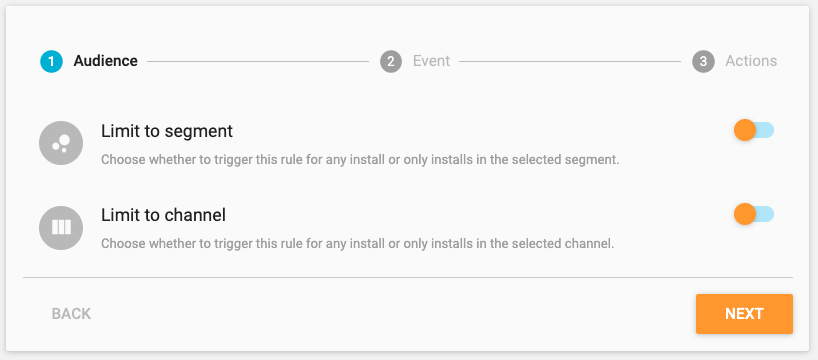
To limit the audience to a segment, toggle 'Limit to segment' and select the segment from the drop-down list.
To limit the audience to those subscribed to a channel, toggle 'Limit to channel' and select the channel from the drop-down list.
If you select both an audience segment and a channel, then an install must match all of the filters in the segment and be subscribed to the channel in order to trigger this rule.
Click 'Next' when done.
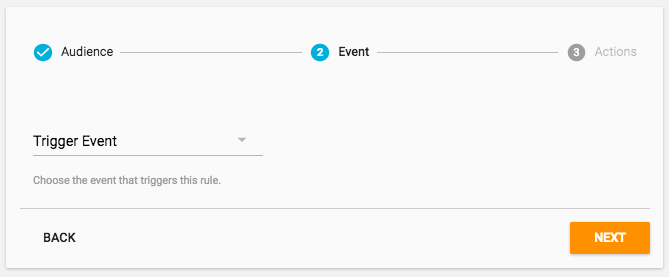
Event
Next, specify the event to trigger this rule.
Currently supported events are:
- Geolocation events:
- Entering a geofence
- Leaving a geofence
- Proximity to a beacon
- System events:
- Conversion funnel drop-off
- Opening app for first time
- Custom analytics events:
- Each time an event occurrs
- Only on the Nth occurrence (within optional timeframe)
Additional events will be added soon including dwell time in a geofence.
Geolocation events
If using a geolocation event to trigger the rule, you need to select the geofence(s) or beacon(s). You can select geofences or beacons individually or, if you have used tags to group your geofences and beacons, you can select one or more tags.
If you select multiple geofence(s) or beacon(s), then any of the selected geofences(s) or beacon(s) will trigger the rule.
![]()
If you select multiple tags, then only geofence(s) or beacon(s) matching all selected tags will trigger the rule.

Funnel drop-off
You can target users who do not complete a user journey or funnel within a certain period of time, for example to encourage users to complete the onboarding flow and retain them within the app or to target users who abandon their shopping cart. Select 'Drop-off triggered' as the trigger event.
First, add the sequence of events that the user must first complete (e.g. added a product to cart). The user must complete all of the events in order - the more events you add, the less users you will target.
Then, select the conversion event that will cause the trigger to fire if they do not complete this event within a certain time (e.g. completing order). You can set the timeout in minutes, hours or days.
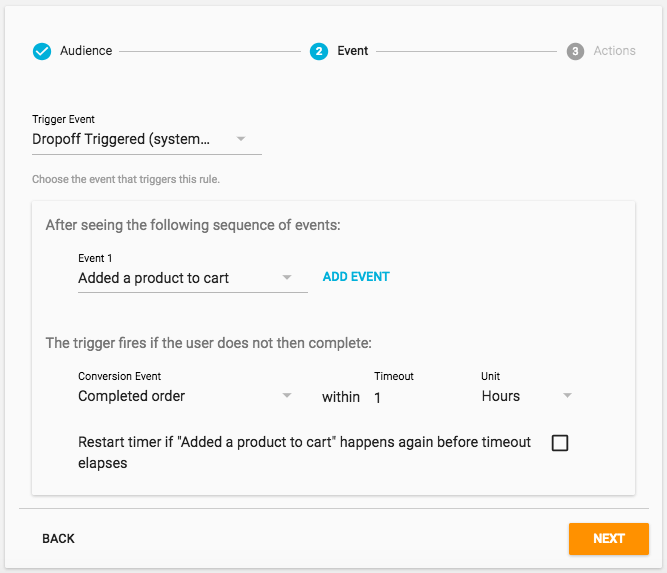
If the last event in the sequence before the conversion event can be completed multiple times (e.g. adding another product to cart), check the box to restart the timer and give the user more time to complete the journey (e.g. to complete the order).
If you do not check the box, the trigger will fire after the specified time after the first occurrence of the last event in the sequence (if the user does not complete the conversion event).
If you have used user association in your app and a user converts by completing events on different devices (e.g. phone and tablet), the trigger will not fire. If you have not used user association, the trigger will fire if all events are not completed on same install (i.e. to convert, all steps must be completed on same device).
To group by user, your app must associate a user with the Kumulos install id. See the integration guide for the appropriate SDK(s) for your app. For example: Swift SDK and Android SDK.
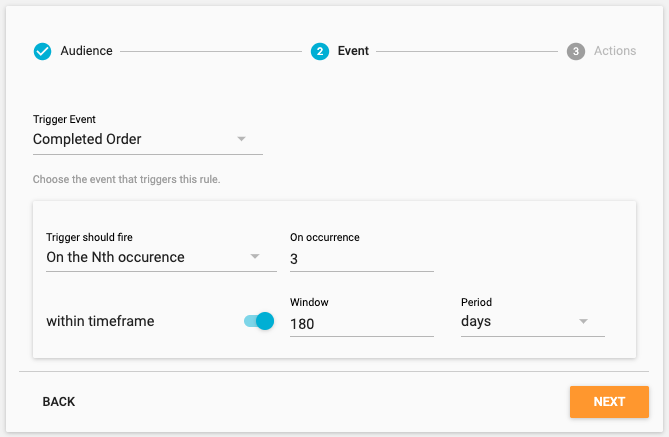
Custom analytics events
If using a custom analytics event to trigger the rule, you can choose whether the trigger should fire 'Each time the event occurs' (default) or 'Only on the Nth occurrence' of the event, where you can specify the number of times each user must complete the event before the trigger will fire, optionally within a timeframe. For example when a user completes their third order within a six month period.
Click 'Next' when you are ready to add actions to the rule.
Actions
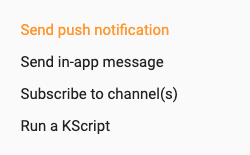
You can add one or more actions, such as sending a push notification, sending an in-app message or running a KScript, to be fired when a rule is triggered.
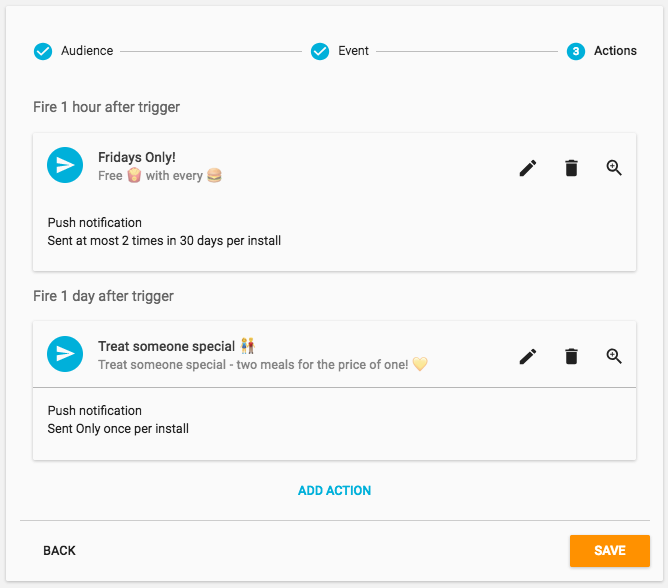
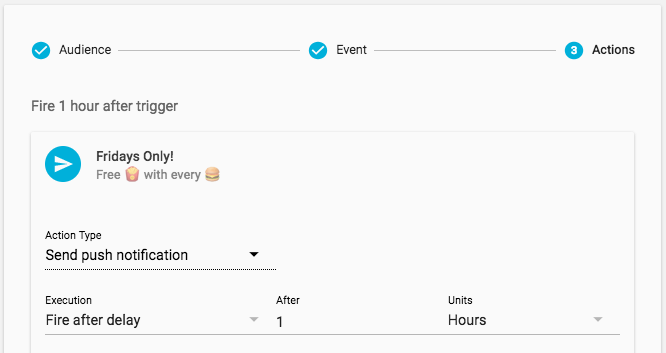
To edit or delete an action, click the pencil or trash icon as appropriate. To preview how a notification will appear on a user's device, click the magnifying glass. Click "Add Action" to add an(other) action to be fired when this rule is triggered. Specify the type of action you want to fire.
Next, specify when the action is to fire, either immediately or after a delay of so many hours or days.
Now, specify any limits to apply to this action. This is particularly important for geoloction events, especially beacon proximity (to prevent the action firing potentially every second an install is in proximity with a beacon). By default, an action will only fire once every hour. This can be changed to:
- Fire unlimited times
- Fire at most once only (per install)
- Fire at most so many times (per install) in a given number of hours or days

We do not recommend firing an action unlimited times for geolocation triggers. This could lead to a bad user experience if an install is on the boundary of a geofence or remains in proximity of a beacon for a period of time.
See the iBeacon Proximity recipe in the cookbook for an example (in Swift) of how to throttle iBeacon proximity events to only when an iBeacon first comes into proximity.
Sending a notification
To send a push notification when the automation rule is triggered, define the content of the notification and any other options (e.g. URL) and click "Done" to add the automation rule.
The options for the push notification are exactly the same as when sending a notification manually from your agency console. However, keep reading for a brief overview of what these are.
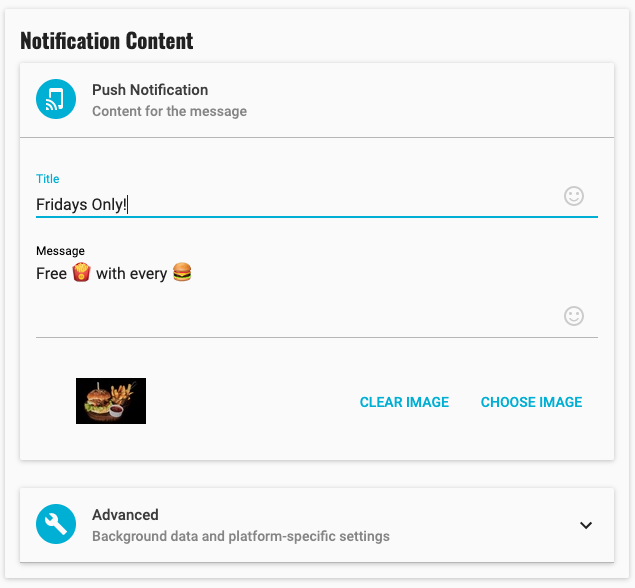
Notification content
If you want the notification to appear in the foreground, add a title and a message. Use the emoji pickers to add emojis to your title and message as required.
Kumulos supports Emoji v4.0 / Unicode version 9.0 which is fully supported in iOS 10.3 and Android v7. Older versions of iOS and Android may not support all emojis available. See Emojipedia for more details of what emojis are supported in which versions.
If you want to add a picture to your notification, click 'Choose Image' to open your Media Library. Here, you can upload a new image, select an image you have previously uploaded or search the Unsplash stock image library.
As you add content to the notification you can preview how the notification will look on a user's device. By default, the preview shows how the notification will look on an iPhone. Click the Android tab to see how the notification will look on an Android phone.
Advanced Options
To open a URL, add a data payload or set any platform specific options, expand 'Advanced'.
## Open a URL
To open a URL when the push notification is tapped by the user, toggle the "Open URL" switch and enter the URL you want to open.
## Background
To send a notification that can be processed in the background, toggle the "Run background handler" switch. The title & message become optional, and can be omitted to create a silent push.
On iOS this will set the content-available flag on the notification.
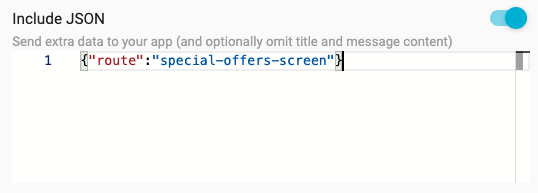
## Data
To add an arbitrary meta-data object to the push notification, for example to trigger a deep link, toggle the "Data" switch and enter a valid JSON object into the editor. Additional data can be consumed by the SDK, please refer to the platform integration guides for further information.
## iOS Badges
To set the badge on your app on iOS, toggle the "Set Badge" switch. By clicking on "Badge Type" you can choose whether to set the badge to the absolute number you enter in "Count" or to Increment the badge by the positive or negative number you enter in "Count".
## iOS Category
To set the category on your app on iOS, toggle the "Set Category" switch. Type in the category.
## Android Priority
To set the priority flag and wake up Android devices, toggle the High Priority switch.
Sending an in-app message
To send an in-app message, first select the template for the message.
Now, decide when the message should be shown to the user. By default, the message will be shown to the user on 'Next app open (after receipt)' of the message. You can choose for the message to be shown 'Immediately, if app open (upon receipt)' by selecting this option from the drop-down. Or, if you only want the message to be shown if the user clicks the push notification (if one is also being sent) or opens the App Inbox, select 'Push/Inbox Only'.
If the template contains any dynamic content tags, enter appropriate values for them here.
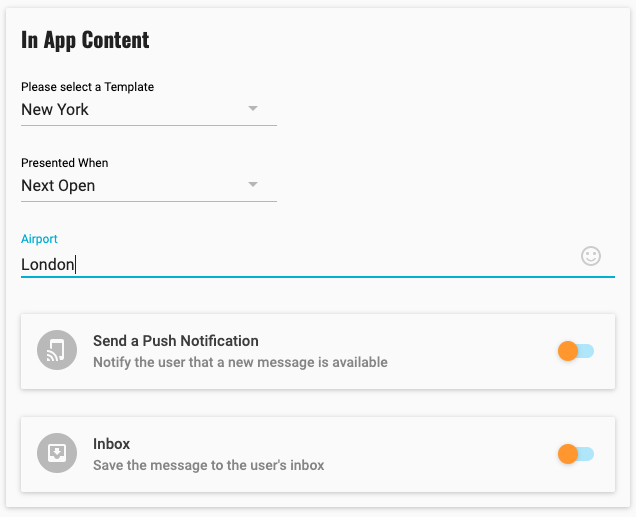
If you also want to send a push notification (to users who have also subscribed to push notifications) that a new in-app message is available, click the 'Push Notification' toggle and enter an appropriate title and subject.
Finally, if you want to save the message in your app inbox, click the 'App Inbox' toggle and enter a title and subtitle for the message. You can also specify how long the message should be available in the inbox, either 'Always', 'Between' two dates/times, 'From' a date/time, or 'To' a date/time.
Click "Done" to add the automation rule.
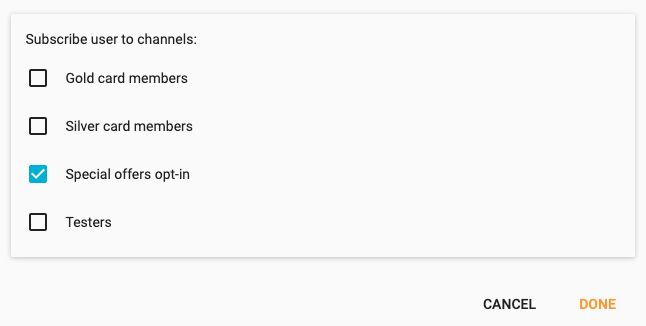
Subscribe to channel(s)
To subscribe the user who triggered the rule to one or more channels, select the channel(s) from the list and click "Done" to add the automation rule.
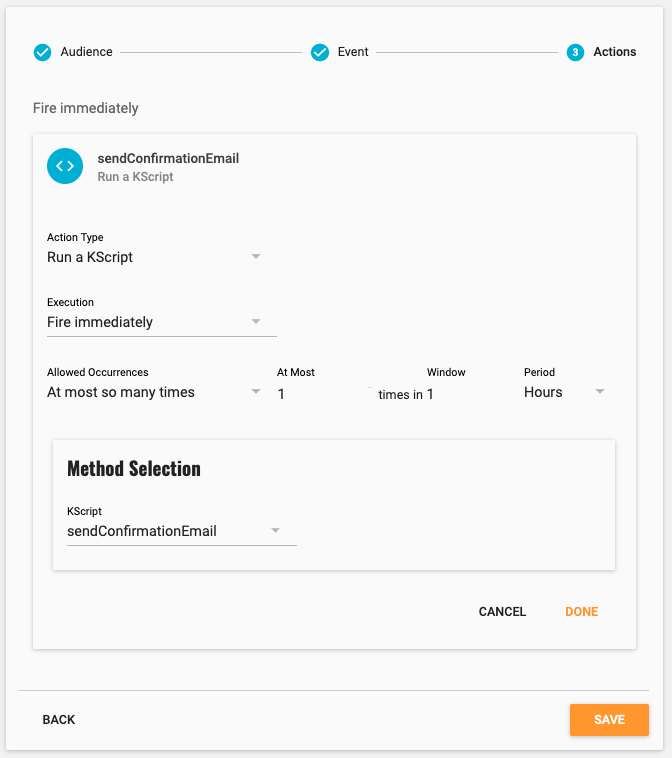
Running a KScript
To run a KScript method when the automation rule is triggered, select the method from the KScript dropdown and click "Done" to add the automation rule.