Web-to-App Banners
Overview
Web-to-App banners are a powerful extension of Deferred Deep Linking that can drive users from your mobile website to your mobile app, with optional incentives such as a 20% discount off their first order using the app. Web-to-App banners will detect if this is a new user who first needs to install the app or an existing user who already has the app installed but has now revisited the website. In both cases they will be directed to your mobile app for the best possible experience.
In order to use web-to-app banners you must configure deferred deep linking as described in the setup guide and integrate the Web SDK into your website.
Creating a Banner
To create a banner, select your app, expand 'Deferred Deep Linking', select 'Deep Links' and then click the primary action button in the 'Web-to-App Banners' tab. You will then see the three steps required to configure the banner.
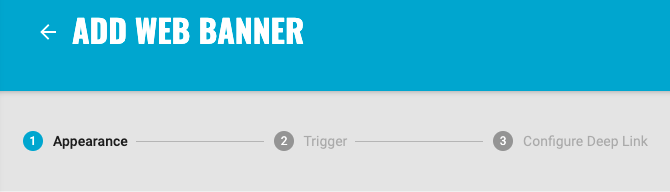
Appearance
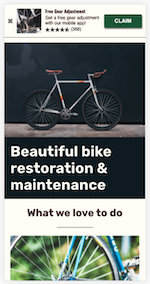
During this step you will customize how the banner will be presented on your website, as you make selections they will be reflected in the preview so you can visualize how the banner will appear to your users.
Labels
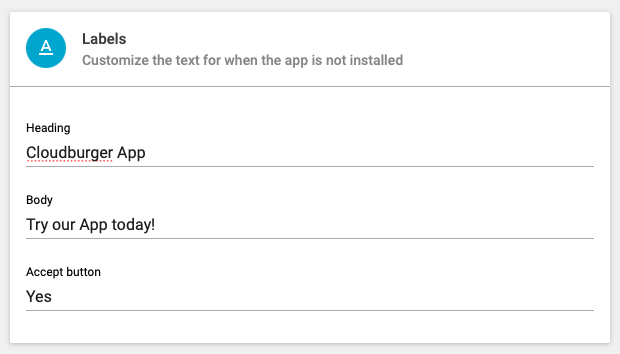
The labels section allows you to customize text that will be displayed for the heading, body and also the button text of the banner. This text will be shown to the user when they do not have the app installed already.
This will update the previewer on the right of the page as you make changes.
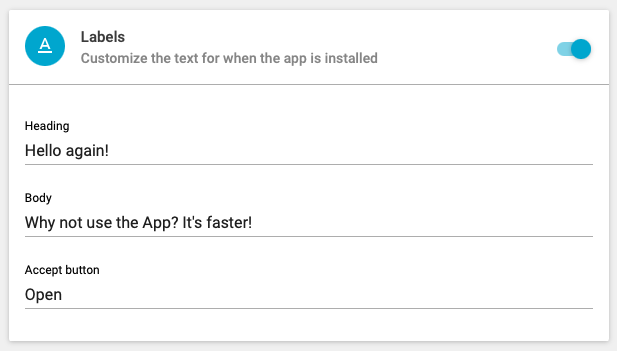
Labels (App Installed)
When a user has installed your app from a Web-to-App Banner, you can choose to show the banner again with alternate content if the user browses your website again.
Enable the second 'Labels' panel for when the app is installed, and populate the content.
The preview can switch between the content for the "not installed" and "installed" states.
Star Rating
The star rating section allows you to show a rating alongside the image icon to encourage users to use the app. Simply toggle this on and you will see the below configuration options.
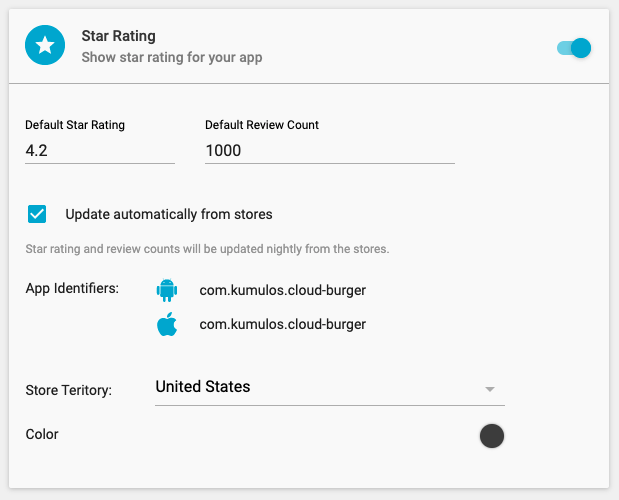
You must set a default star rating and review count to act as a fall back regardless of whether the automatic updates are enabled.
Optionally, you can also click the tick box to automatically pull in recent updates from the relevant store fronts. This will keep your star rating and review count in sync with daily updates from the real store.
In order to enable this you must also select the store territory for Kumulos to track.
Appearance
You can customize the colors for every element of the banner and whether this is positioned at the top or the bottom of the page.
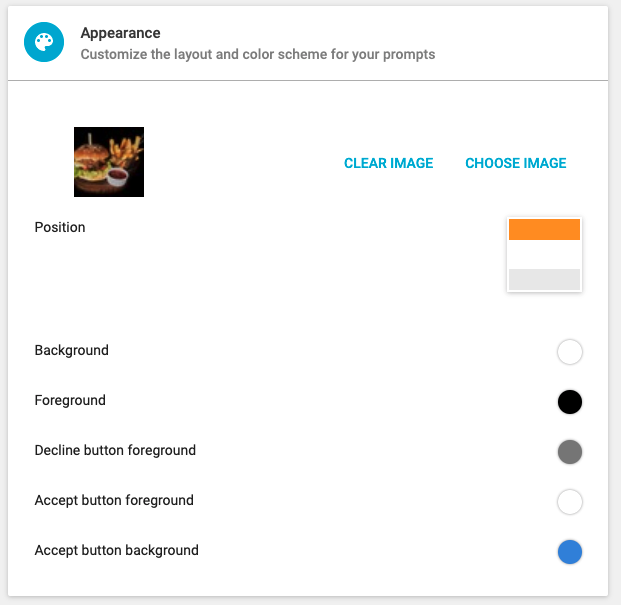
Choose an Image
It is mandatory to select an image for the banner to use to represent the app. This should be the app icon or a brand icon that users would associate with the app as they will be linked to it through the banner.
Click CHOOSE IMAGE to open your media library. Here, you can upload a new icon or select an icon previously uploaded.
To upload a new icon, click the upload primary action button. Click 'Choose File' to browse your computer and find the icon. Select any tags to help you find the icon later or to add a new tag, just start typing and click 'Create new tag'. Click 'Upload' to add the icon to your media library and use this for the overlay.
To use an icon you have previously uploaded, simply select the icon and click the tick primary action button. You can either scroll through your library or filter by the tags you have added previously.
Colors
You can customize the colors of the banner to suit your website. Choose the colors for text, buttons, and backgrounds by clicking the appropriate color picker icon. Click 'Confirm' once you have selected the desired color.
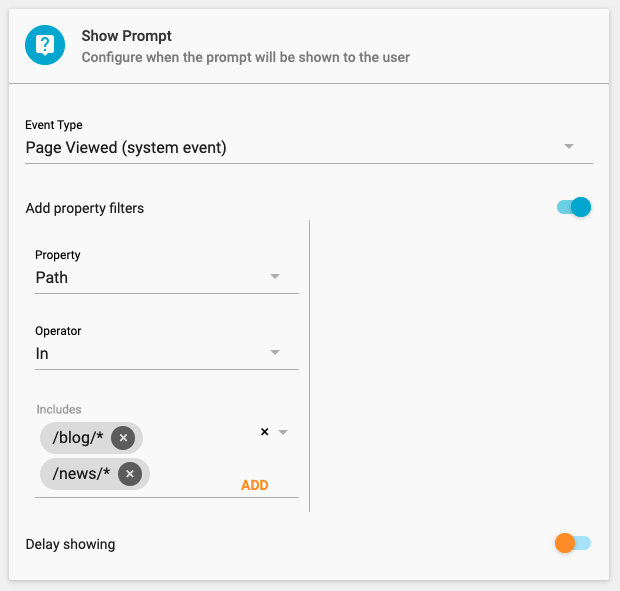
Trigger
First you need to select the event that should cause the banner to be shown. This can be any analytics event tracked by your site (for example a product purchase event) or when a page is viewed.
You can also match properties of the analytics event, for example only show on pages matching a certain path or for purchases over a certain value.
To configure a banner to show on some or all pages, select 'Page Viewed (system event)', with the 'Path' property and the 'In' operator. Under 'Includes' add the paths for the pages where the banner should be shown. This can be the complete path or a wildcard. For example:
To show the banner on every page, you don't need to add any filters.
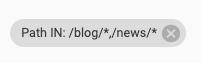
To show the banner on every where path starts blog or news:
- Enter /blog/* and click 'Create Option /blog/*'
- Enter /news/* and click 'Create Option /news/*'
- Click 'Add'
You can have multiple path options in each 'Includes', in which case the banner will be shown if the page matches one path or another path option. For example: where path starts blog or news:
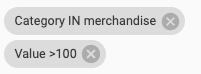
You can also 'Add' multiple 'Include' filters, in which case the banner will only be shown if the event includes every filter (i.e. event must match filter one and filter two etc). For example: when a product is purchased from category 'merchandise' with value greater than $100 USD.
Please note if you include two paths like this then the banner will only be shown if the page matches path one and path two. If this is not desired, click the 'x' icon to remove the filter.
If you do not want the banner to show immediately on the page, toggle 'Delay showing' and enter how many seconds to wait before showing the banner.
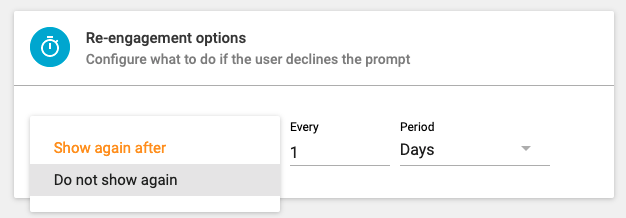
Re-engagement options
This option will allow you to configure what happens if the user closes the banner and whether to show the user the same banner again after a set time period or never to display to the user again.
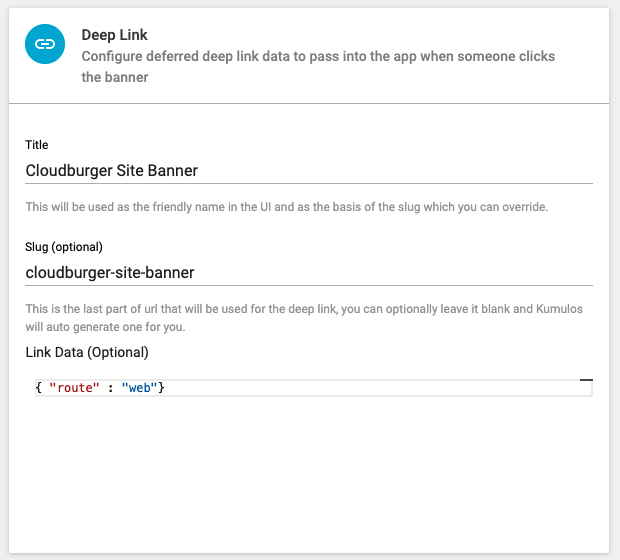
Deep Link Configuration
Here you can configure the title, slug and any additional data to be passed to your app when a user installs the app via clicking on the banner.
The title will be the name shown in the Web-to-App Banners list view for reporting purposes, and depending on the route the user follows to download the app may be shown on the store redirect landing page to prompt the user to open the relevant app store for your app.
You can also pass any relevant data into the Kumulos SDK within the app for reporting or deeplinking to a specific page within the app after download as a JSON payload.
Once you are happy with the banner configuration, press 'Save' to activate the banner and show it on your website.
Next Steps
Please have your developer complete the necessary Deep Linking setup and Web SDK integration to fully enable the feature on your website & in your mobile app.
Technical Implementation Notes
Web-to-App Banners use a combination of techniques to achieve link resolution including:
- Copying to and reading from the device clipboard
- Probability-based matching using user network, and device attributes
The clipboard is only used in cases where the user did not have the app installed already and installs the app for the first time. On the first app launch, and if the user has tapped on a Banner or Deferred Deep Link, the app will indicate that the clipboard was accessed.
Probability matching is used for the case where a user already has the app installed but has not previously converted from a Web-to-App Banner. In this case, it is necessary to perform matching using probability scores for device attributes (a technique sometimes called fingerprinting). Match data is not stored indefinitely or used for any purpose other than matching the banner tap to the user.
Under Apple's App Tracking Transparency guidelines, you may need to get user consent if you use Deferred Deep Linking for cross-platform ad-targeting, attribution, or if you plan to sell any user data.
Using Kumulos Web-to-App Banners or Deferred Deep Links to direct users from your website to mobile app, or send your users to promotional content in the app is allowed and does not require consent.
Kumulos does not sell user data, or perform any cross-platform attribution or advertising functions.